Stop Roof Leaks Before They Start
Finding signs of a roof leak on your ceiling is incredibly stressful. When a roof starts leaking, most people assume that the shingles are damaged or missing. However, after years of inspecting and repairing roofs, we can tell you that the shingles are rarely the primary culprit. Instead, water usually finds its way inside because of a failure in a small, hidden component working behind the scenes. Your roof’s flashings. Let’s learn more about a particular type of roof flashing called step flashing.
What is Step Flashing?
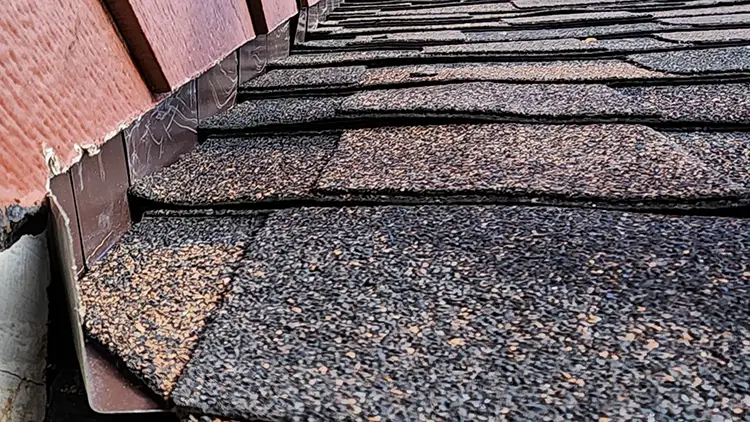
To understand how your roof stays dry, you need to know about a critical part called step flashing. Step flashing consists of small, L-shaped pieces of metal. Roofers place these metal pieces down in individual layers, weaving them directly between the shingles as they build up the roof. This technique is used wherever a sloped roof meets a straight vertical wall, such as the side of a dormer, a chimney, or a second-story wall. The photo above shows a home’s step flashing with a kick out flashing to help keep the wall dry.
This specific style of flashing is one of your home’s main defense against water intrusion. Roof valleys and wall intersections are the most vulnerable joints on your house because massive amounts of rainwater channel directly down those paths. The layered, overlapping metal pieces act like a slide, forcing water to flow safely over the shingles and into the gutters. Without proper step flashing, water will easily seep behind your siding, rot your wood framing, and ruin your drywall. Protecting these seams is the single most important factor in keeping your home dry and secure.
How Does Step Flashing Work?
Understanding how step flashing works is much simpler when you look at how water behaves. Water always follows the path of least resistance, flowing downward with gravity. If a sloped roof simply bumped up against a flat side wall with nothing in between, water would run down the roof, slip into the crack where the wood meets, and pour directly into your home.
Step flashing solves this problem through a simple, overlapping design. Think of it like the slats on a set of window blinds. Each piece of flashing is a small piece of metal bent at a 90-degree angle, forming an L-shape. One flat side of the “L” sits flat on the roof deck, right underneath the shingle. The other half goes straight up against the wall, tucked safely behind your siding or house wrap.
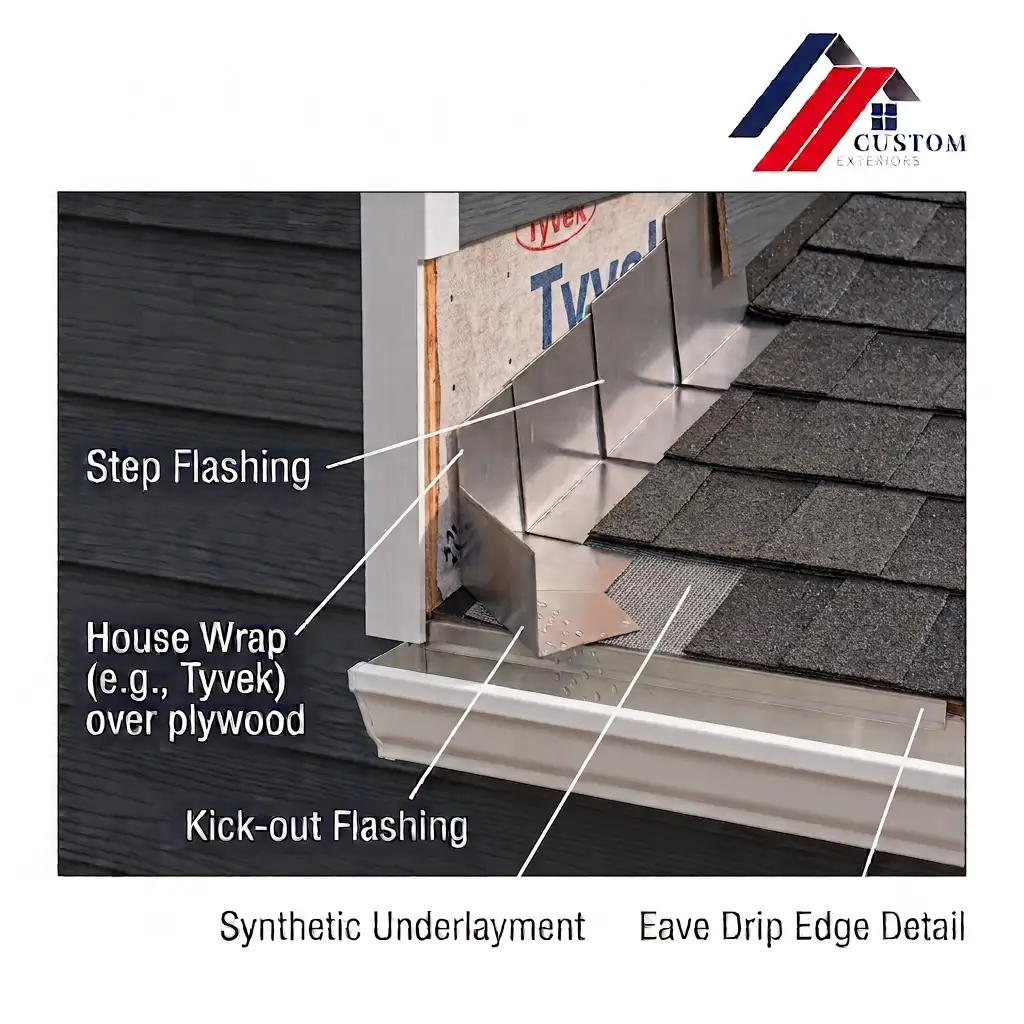
The Weaving Process
To create a watertight seal, a roofer must install these metal pieces one by one in a specific pattern:
- Underlayment (a water-resistant or waterproof barrier material) is installed directly onto your roof’s wood decking before the shingles go on.
- The drip edge (another form of flashing) and ice and water shield (a protective layer on the outer edge of your roof to help protect from ice dams and other damage) is installed.
- The starter shingle (the first layer of specially designed shingles) are installed on top of the underlayment/flashings.
- A single piece of step flashing is then placed right on top of the starter shingle and nailed to the roof decking.
- Your first shingle is then installed, directly over the flashing, hiding most of the metal from view. The shingle is lined up and a 1/8″ gap is left between the wall and the start of the shingle. This allows for water to freely flow down that channel.
- The next piece of step flashing goes on top of that shingle, slightly overlapping the piece below it. Each piece of step flashing is installed in a manner that when the shingles are installed, the flashing on the roof decking will be almost completely covered.
This alternating pattern repeats all the way up the wall. Because each metal piece overlaps the one beneath it, it creates a continuous, downhill staircase for water. By leaving a small gap between the shingle and the wall flashing, you provide a clear path for water to drain from your roof.
How Step Flashing Guides Water to Your Gutters
When heavy rain hits the side of your house, it runs down the siding, hits the metal flashing, and gets pushed out onto the surface of the shingles. From there, the water continues traveling safely down the roof until it pours into the gutters.
By weaving the metal and shingles together, the system isolates every single row of roofing material. If water manages to get past one shingle, the metal piece directly underneath catches it and forces it back out to the surface. This simple rule of gravity keeps the interior structure of your home completely dry, even during severe storms.
Water follows gravity down the slope of your roof. When rain hits a vertical wall, it flows down the siding and hits the upright portion of the step flashing. The bent angle directs that water onto the horizontal metal leaf, which channels it safely onto the top of the shingle below. The water flows from shingle to metal step, down to the next shingle, and straight into the rain gutters without ever touching the wood framing behind your siding.
Step Flashing vs. Continuous (Apron) Flashing
Continuous flashing, also called apron flashing, uses a single long piece of metal bent along a straight joint. Roofers use apron flashing across horizontal joints, such as the bottom front edge of a dormer or where a low roof meets a flat wall facing down the slope.
Step flashing uses multiple smaller pieces applied incrementally up a vertical incline.
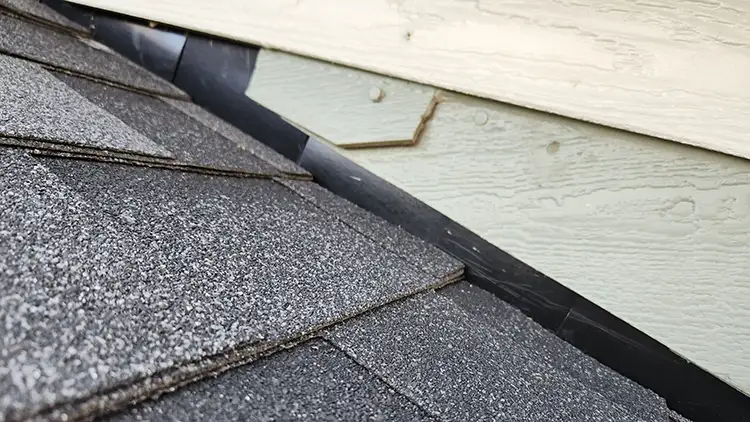
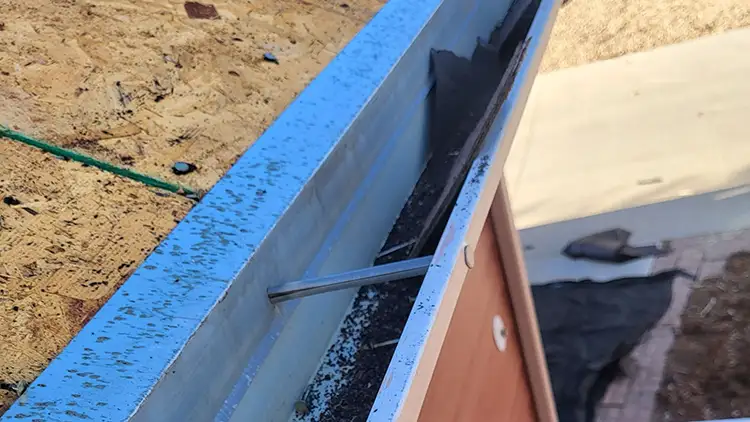
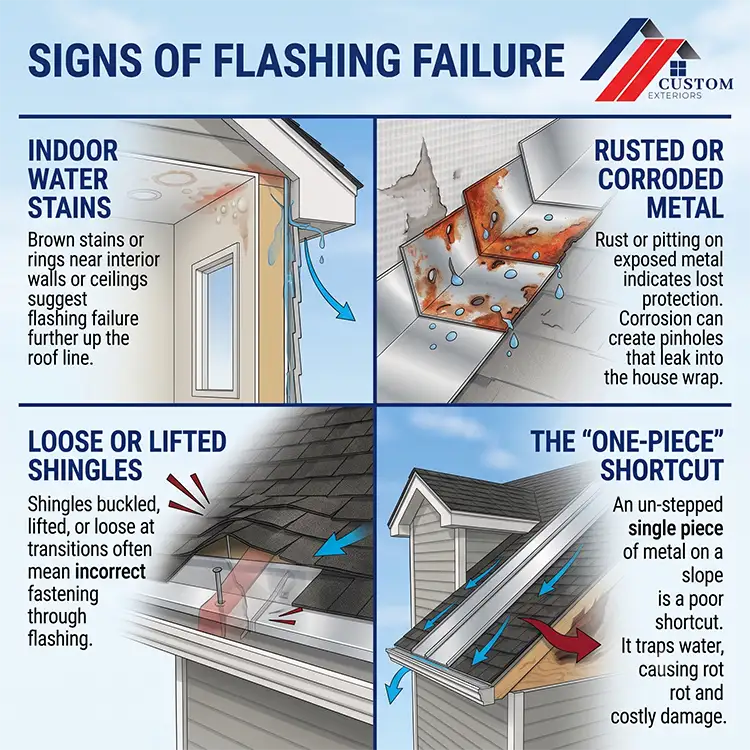
Using a single continuous strip of metal down a sloped wall creates severe leak risks. A sloped joint experiences water moving down the roof and running sideways off the wall simultaneously. A solid, unlayered strip of metal gives water a direct path underneath the roofing materials. Water gets trapped behind the solid metal, saturates the underlayment, and rots the wood deck.
Step flashing prevents this failure by isolating every single row of shingles. Each step acts as an independent water barrier, catching runoff and shedding it immediately onto the outer surface before moisture can creep into the home.
The Most Vulnerable Areas on Your Roof
Dormers
Dormers add extra living space and light inside, but they create long, sloped wall intersections on the exterior. Every spot where a dormer sidewall meets the sloped roof deck requires a complete run of step flashing from top to bottom.
Chimneys
Brick, stone, and stucco chimneys require dedicated flashing systems. Step flashing runs up the sides of the chimney structure, working in tandem with counter-flashing cut into the masonry mortar joints to keep heavy rain out of your living space.
Roof-to-Wall Transitions
Multi-level homes feature several spots where lower roof sections meet two-story exterior walls. These long, angled seams handle massive volumes of water during heavy downpours, making them prime candidates for step flashing protection.
Signs of Failing or Improperly Installed Step Flashing
Why Proper Installation Requires Expertise
Precision Fastening
Correct installation requires strict adherence to proper nailing procedures. Fasteners must go high up on the vertical wall flange, well above the water line. Driving a nail through the flat metal deck surface creates an instant hole for water penetration. A skilled contractor knows the exact placement for every nail.
Seamless Wall Integration
Step flashing cannot simply sit on top of finished siding. The vertical metal leg must sit directly against the wall sheathing, placed behind the house wrap or weather barrier, and then covered by the siding planks. This layered integration creates a complete drainage plan from the wall studs outward.
Repairing vs. Reusing Metal During Roof Replacement
During a full roof replacement, reusing old step flashing is a major mistake. Old metal develops small stress cracks, nail fatigue, and hidden corrosion around older holes. Installing brand-new shingles over old metal compromises the new roof system from day one.
Protecting Your Home’s Value
Step flashing remains invisible to most homeowners, yet it serves as one of the most important protective barriers on your entire property. Proper materials, correct layering, and precise installation keep heavy rainwater moving safely toward your gutters instead of inside your walls.
Regular roof inspections catch small flashing issues before they cause hidden water damage inside your home. If you notice interior water marks, lifted shingles along a wall, or suspect an improper installation on your roof, contact a licensed, local roofing professional to perform a thorough check and secure your home.