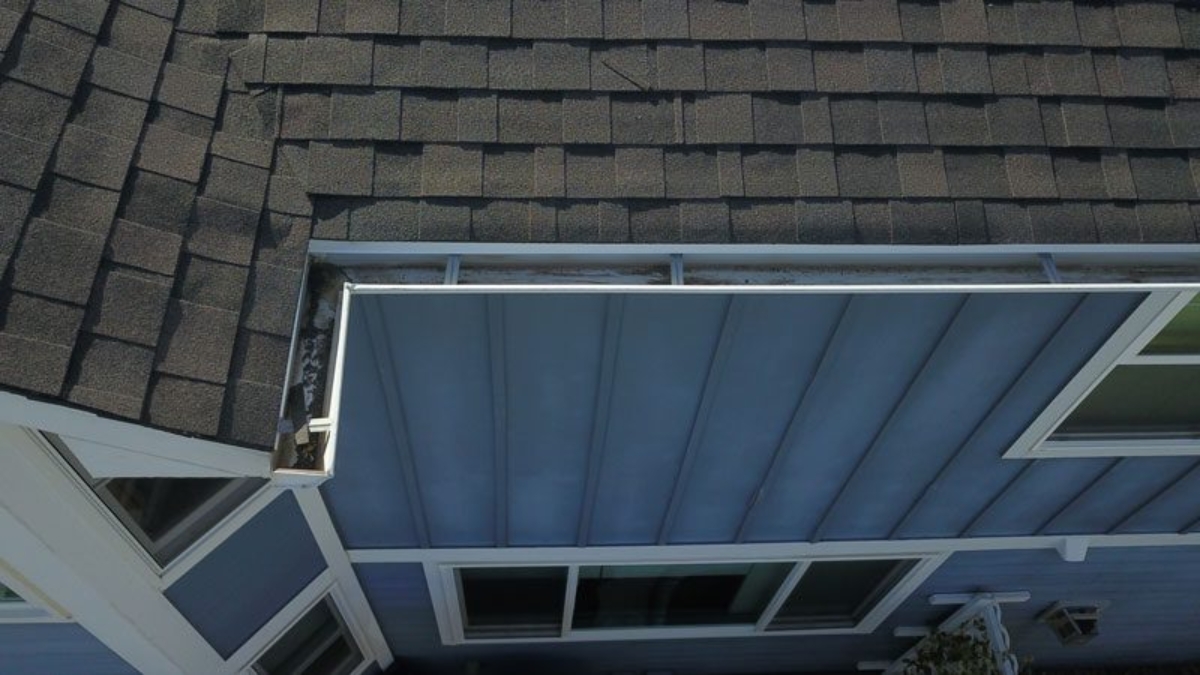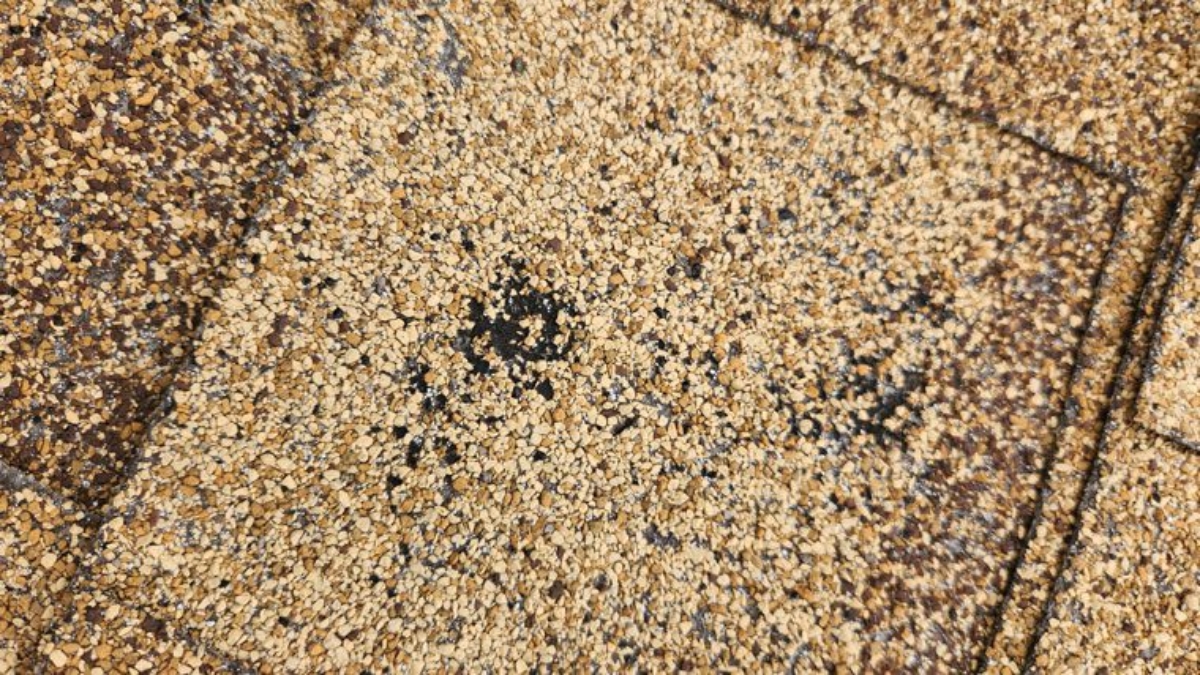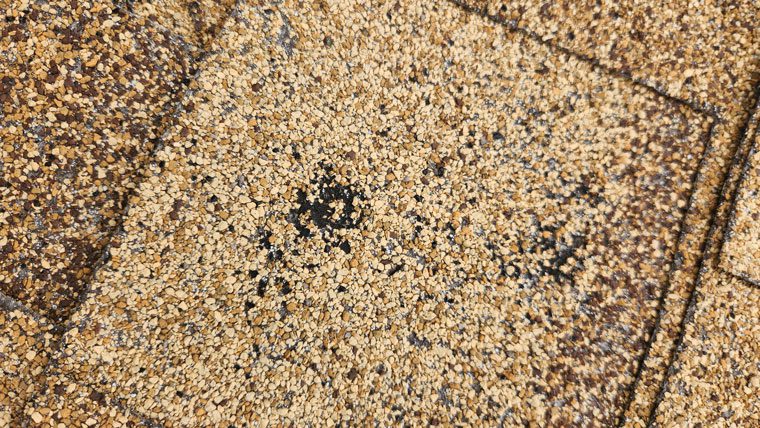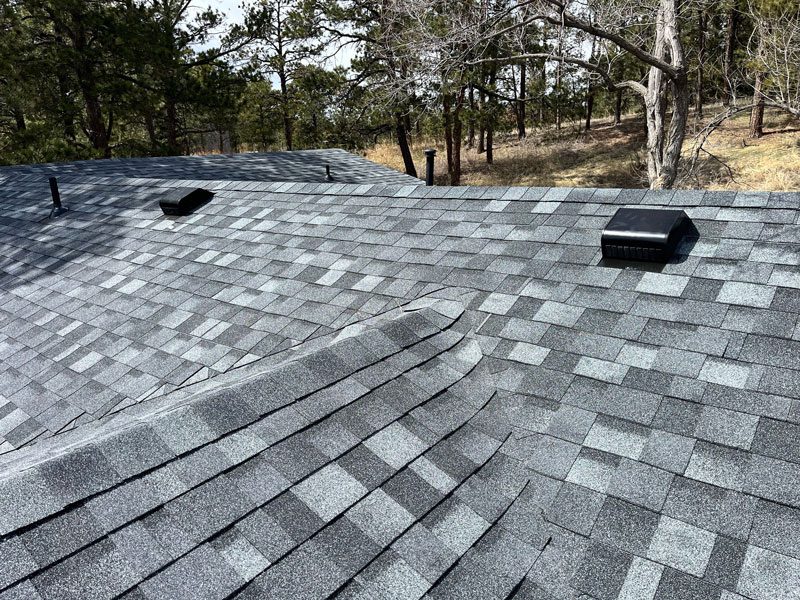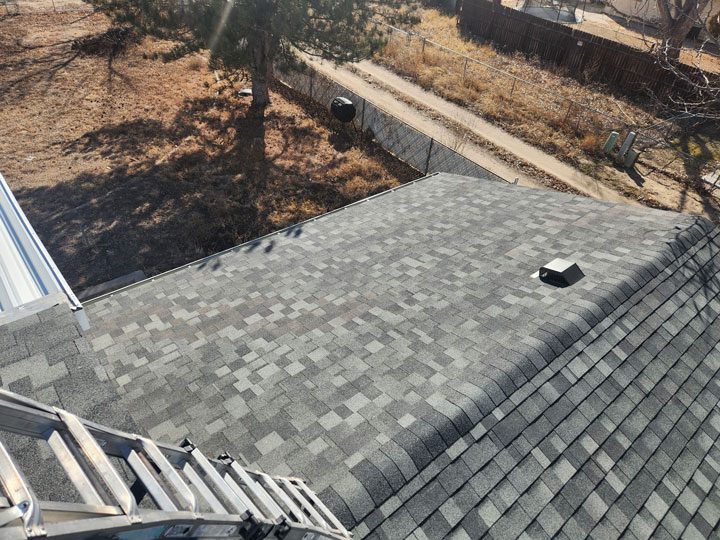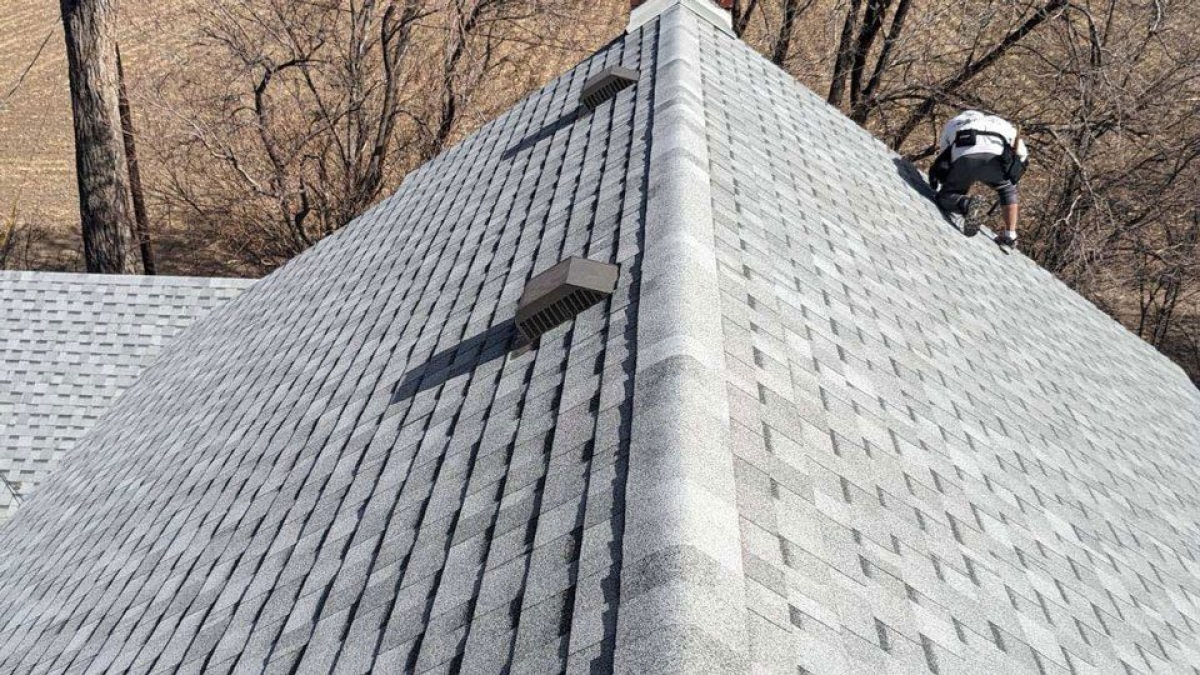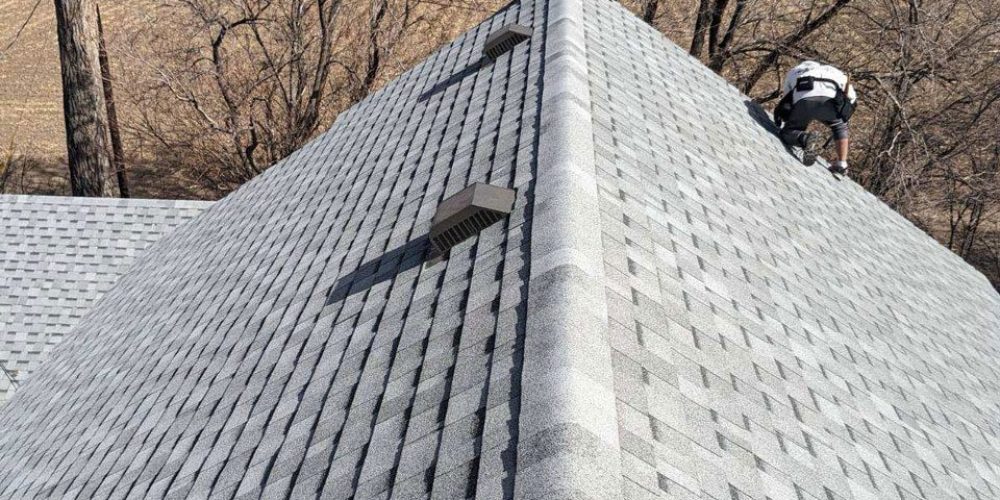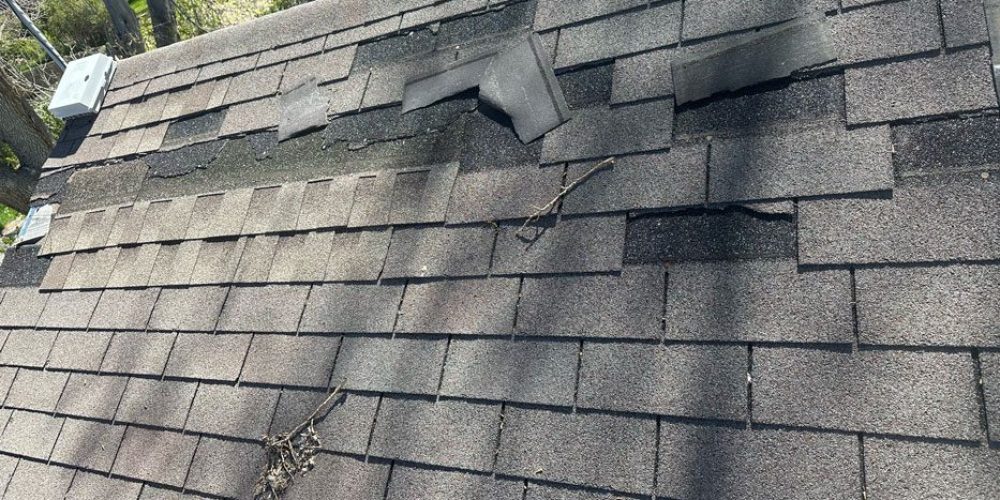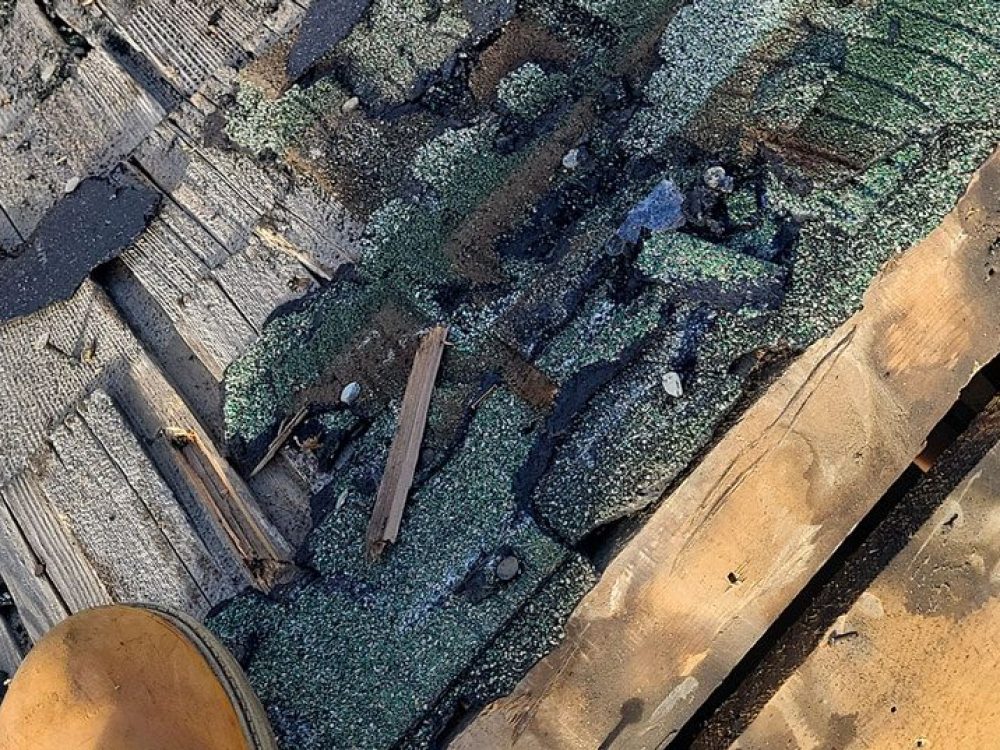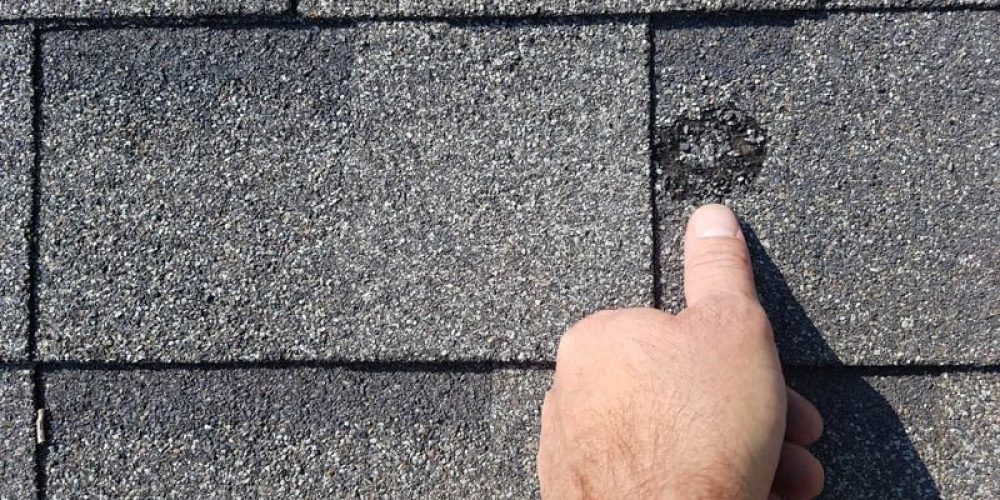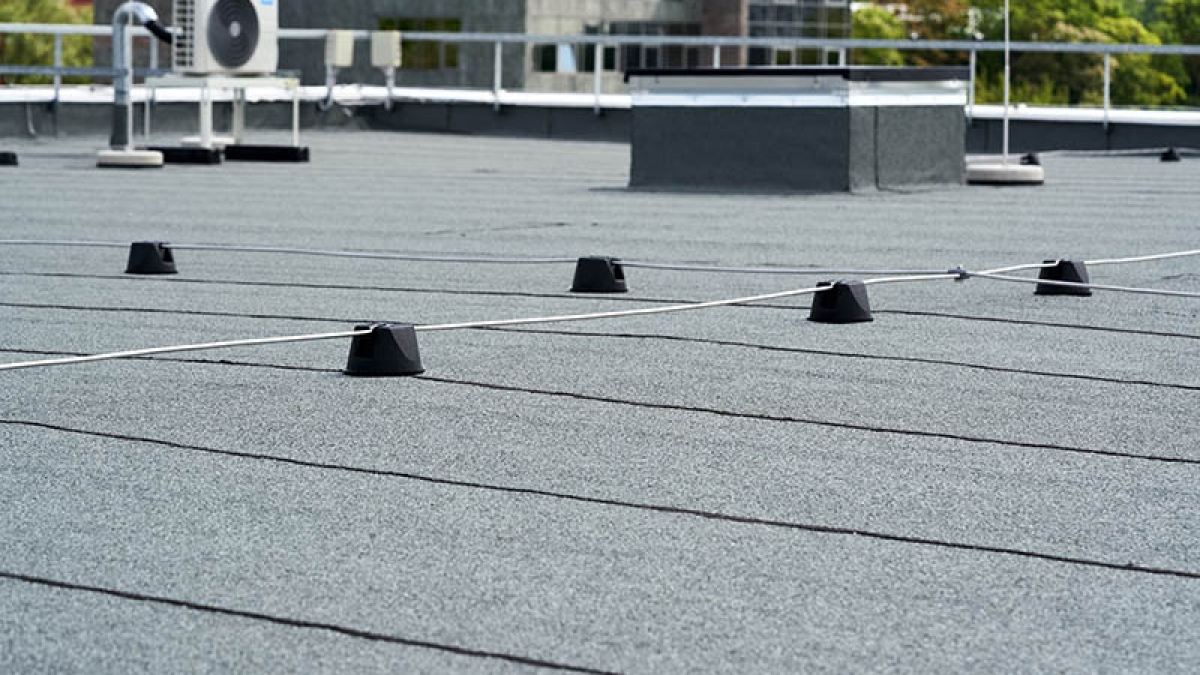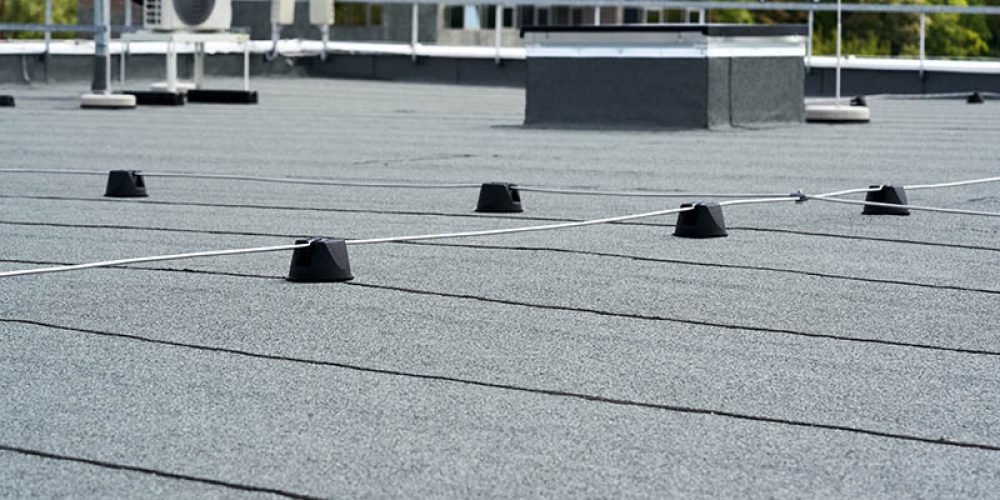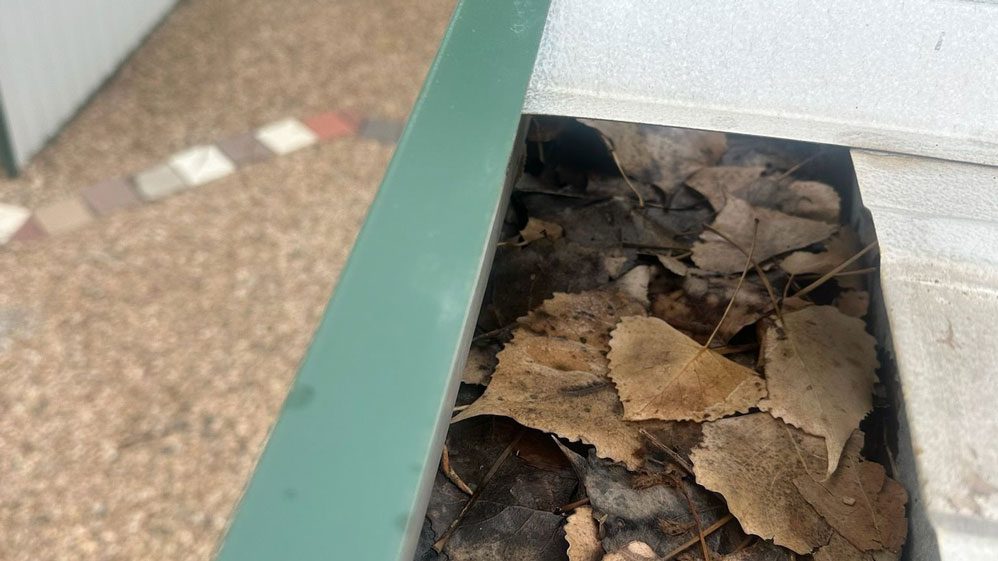
Hail damage discovered by Custom Exteriors during an inspection of a hail damaged roof in Northern Colorado

Hail Damage Roof Repair Tips from an Expert Hail Damage Roofing Contractor

Hail damage to roof discovered during roof inspection in Northern Colorado by hail damage roofing contractor, Custom Exteriors

Tips from a hail damage roofing contractor: Ensuring Effective hail damage roof repair

As a Colorado native and a roofing company, we know all too well that hail damage in Colorado can be severe. Most in the roofing industry remember the hail storm that hit Jefferson County in May of 2017, causing $2.3 billion in property damage in Jefferson County alone. I remember it vividly. We were beginning to grow the company we had opened in 2015. My husband left to visit Cuba for a birthday and figured early May would be a safe time to go without the risk of major hail. Wrong. On May 8, 2017, the Denver Metro area was pummeled with baseball-sized hail, becoming the most damaging storm in Colorado, forcing the closure of the Colorado Mills Mall for months. It is also the second-most expensive hail storm in U.S. history. Long story long, we were swamped and overwhelmed, and the head of our roofing department was in Cuba. 

While this was one of the most stressful times in my recent work history, I often consider how people’s homes were destroyed with broken windows, exterior damage everywhere, and interior water damage. Some homes and businesses even became uninhabitable. That storm taught us the importance of customer service and communication when dealing with hail damage roof repair and the time-consuming process of restoring homes and businesses to their pre-storm condition. Since that year, we have made changes to our systems and staffing to ensure that, as a hail damage roofing contractor, we are not adding to the stress these homeowners are already experiencing. 

Colorado’s frequent hailstorms, often accompanied by high winds, can cause significant damage to your roof, siding, windows, and gutters. We fully understand the financial impact of hail damage on Northern Colorado homeowners because we have experienced it personally. In 2023 alone, hailstorms caused approximately $600 million in damages across Colorado, a good portion of which affected our communities. This underscores the urgent need for homeowners to be prepared for such events.

Over the last few decades, we have seen storms that leave little to no damage. We have also seen storms so severe they often require extensive repairs on multiple exterior systems including your roof, windows, gutters, and siding. This highlights how crucial it is for homeowners to have a roofing and exteriors contractor they can trust – and a solid understanding of the insurance claim process. We’re going to try and provide you with both by the end of this article.

Finding a hail damage roofing contractor

I limped through those days while Mike was in Cuba, and it was extremely stressful. I could have provided better service, looking back. Since then, the Custom Exteriors roofing team has become a leading hail damage roofing contractor across Colorado, implementing strategies based on our experience to help create a stress-free roof replacement. Here are the things you should look for in a contractor if you need to replace your roof due to hail: 

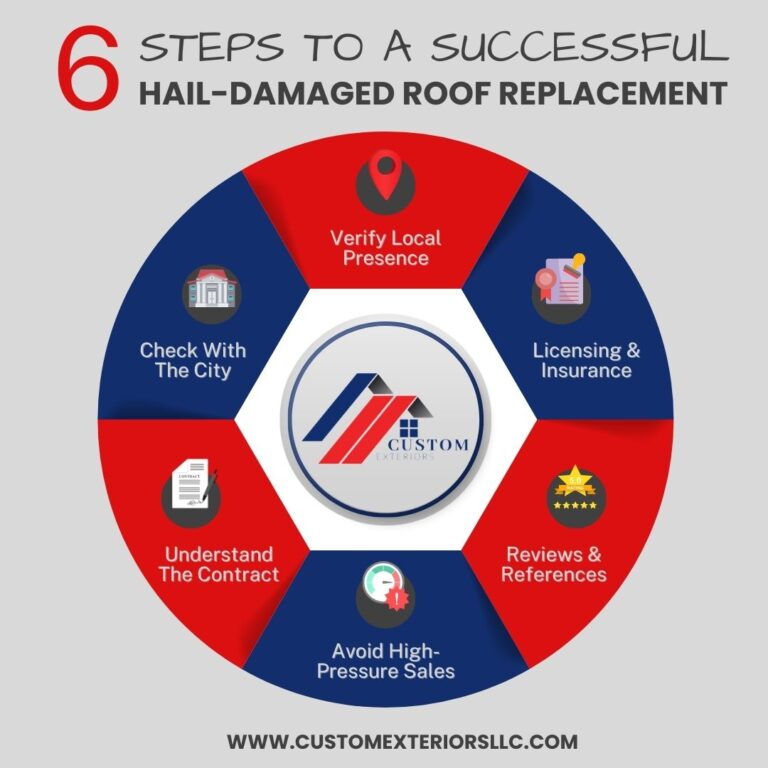
Infographic created by Custom Exteriors about six steps to a successful hail damage roof replacement contractor choice

Verify A Local presence

Anyone who lives along the Front Range in Colorado knows about storm chasers. If you haven’t had a significant hailstorm in your neighborhood yet, storm chasers are roofing contractors who follow severe weather events, such as hailstorms, to solicit business from vulnerable homeowners. While not all storm chasers are unscrupulous, many engage in questionable practices. We have even seen these “contractors” collecting payments from entire neighborhoods and vanishing.

A legitimate, local roofing contractor should have a local office and a permanent business address. Ask for their physical address and verify it. Storm chasers often set up temporary offices or use P.O. boxes, making it hard to track them down later if issues arise. Check if the contractor has a local phone number and a record of operating in your area for several years. Another simple step is checking your local BBB. Most reputable roofing companies will be registered with their local BBB. 

Check Licensing and Insurance

The contractor needs to be properly licensed and insured to work in your city. Most local jurisdictions require licensing through them. To obtain a license, the contractor will typically need to have passed the ICC (International Code Counsel) test on roofing, be able to provide verifiable experience and provide licenses through other jurisdictions. Roofing contractors will also have to provide proof of both workmans compensation and general liability insurance to the city. Despite this, ask for proof of insurance and verify it with the insurance provider. Legitimate contractors will be fine providing this information, while less established and trustworthy contractors might be evasive or provide incomplete documentation.


Look for reviews and references

Reputable contractors will have positive reviews and references from local customers. Check online review platforms like Google, Yelp, and their social platforms. Ask the contractor for references and follow up with past clients to hear about their experiences. If a contractor has multiple negative reviews, this could reflect poor business practices and a lack of customer service. 

Be wary of high-pressure tactics

Because we are a local, licensed, reputable roofing contractor, we don’t need you to sign now! We want you to take your time and be completely comfortable with the scope of work, the associated cost, and our ability to complete your roof replacement successfully. We ask our customers to look at our online reputation and our portfolio of completed jobs. We are confident that this review will show Colorado homeowners that we are the most qualified roofing contractor for their roof replacement. There is no need for high-pressure sales tactics when your local reputation precedes you.  

Door-to-door salespeople often use high-pressure sales tactics, urging you to sign a contract immediately to take advantage of “limited-time” offers or scare tactics about urgent repairs. A reputable contractor will perform tarping if necessary, give you time to make an informed decision, provide a written estimate, and explain the work that needs to be done.

Regarding those “limited-time” offers, Colorado law prohibits roofing contractors from waiving insurance deductibles as a marketing tactic. This means that homeowners must pay their deductible as outlined in their insurance policy, and contractors cannot offer to cover this cost to entice business. This law is intended to prevent fraud and ensure that claims are handled properly and ethically.

Examine the Estimate and contract closely

Additionally, Colorado law requires that contractors provide written contracts detailing the scope of work and costs, ensuring transparency.

Before signing any agreement, carefully review the contract and the estimate. Unscrupulous contractors will often try to provide “total only” estimates. These estimates do not break down services and materials but only give a total amount for your roof replacements. This allows them to add costs never incurred or inflate pricing on services rendered without justification to the homeowner. Your hail damage roof replacement estimate should include detailed information about the scope of work, materials to be used, start and completion dates, payment terms, and warranties. Avoid contractors who ask for large upfront payments or who are vague about their terms.

Check with local authorities

Contact local building authorities or state licensing boards to verify the contractor’s credentials. These organizations can provide information about the contractor’s licensing status, any complaints against them, and their reputation for passing and closing out their permits in the community.

By following these steps, you can protect yourself from storm chasers and inexperienced contractors. A little due diligence can go a long way in safeguarding your home and ensuring that any repairs are done professionally and to your satisfaction.

Most local cities have an online portal for citizens to access licensing and permit information. The City of Greeley does a great job with its Etrakit system. It is easy to use, and with a few clicks, you can verify contractor licenses and permits pulled for your address. 

Filing an insurance claim after hail damage to your roof

Hail damage discovered by Custom Exteriors during an inspection of a hail damaged roof in Northern Colorado

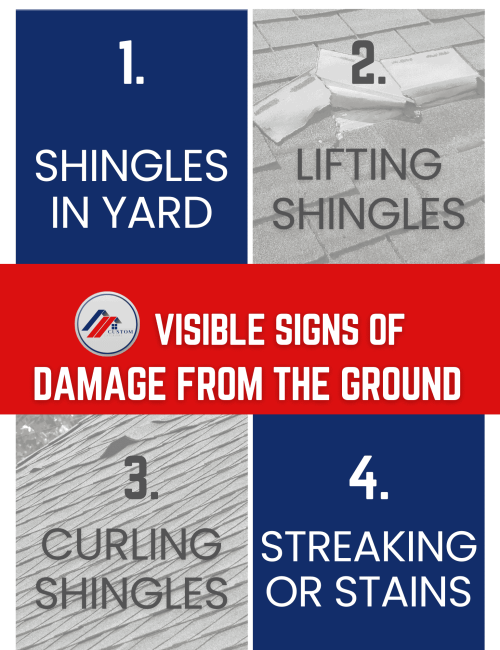
Sometimes, like in the photo above, hail damage to your roof is large enough that you can likely identify the damage from the ground. However, there have been many instances where the roof looked intact from the ground, and upon further inspection, our team identified enough hail damage to justify a hail damage roof claim. Either way, once you and your roofing contractor have identified the need to file a claim for a hail damage roof replacement, the following steps should guide you through the process. 

As a local roofing contractor, we remind our customers that your insurance company has a timeline for claim eligibility. If you wait too long, they won’t cover your damages. This timeframe is often one year from the date of loss. So, if your roof was damaged by a recent hailstorm, filing an insurance claim in a timely manner can help you cover the roof replacement costs. If you miss that window, you may be responsible for your roof replacement cost. 

Assess the damage before filing a claim

The first step after a hailstorm is to inspect your property for damage. Safety comes first, so if the storm is severe, ensure there are no immediate hazards like loose shingles or broken glass. Also, remember that a roof inspection requires properly using a ladder and the ability to work at heights safely. If you have any questions about your abilities, hire a pro. If you complete the inspection, take detailed notes and photographs of all visible damage you can see from the ground. Pay special attention to the roof, but don’t neglect other areas like gutters, siding, windows, and other structures on your property. Most reputable roofing companies offer roof inspections at no cost, so this task is better left to the professionals. They know exactly what is expected during a roof inspection for an insurance claim. They can help negotiate with your insurance to ensure you are compensated adequately to return your home to its pre-storm condition. 

Review Your Insurance Policy

Every season, while completing hail damage roof replacements, we never fail to run into a homeowner who unknowingly has an ACV policy. Because homeowners are sometimes unaware of their actual coverages with more concentration of monthly savings, they end up with a roofing policy that only pays a portion of the replacement. Whatever portion of the roof was depreciated will not be reimbursed upon the completion of the roof replacement like a standard RCV policy would. 

Before filing a claim, it’s crucial to understand what your insurance policy covers. Policies vary significantly; you need to know your coverage limits, deductibles, and any specific exclusions. Many Northern Colorado jurisdictions require code upgrades such as replacing spaced decking or adding drip edge. If you don’t have a code upgrade clause, you may be on the hook for the costs of these upgrades. The City of Fort Collins requires upgrading to Class 4 shingles, making some code upgrades reasonably costly. Understanding what is and isn’t covered before the storm will help set your expectations for the claim process and potential out-of-pocket costs.

Contact Your insurance company

Notify your insurance company about the potential damage as soon as possible. As we discussed, many insurers have specific time frames within which you must report damage to qualify for coverage. Provide them with all the necessary details and documentation you gathered during your initial inspection or from your roofing contractor. 

Schedule inspections: Insurance adjuster and roofing contractor

Your insurance company will likely send an adjuster to inspect the damage. Be present during the inspection to ensure that all damage is noted. This is also an opportunity to ask questions and understand the adjuster’s assessment process. Provide them with any additional information or documentation they might need. We make a practice of meeting the insurance representative on the job to ensure all of the damage we located is included in your claim. 

Your roofing contractor will also complete an inspection that will help with claims process. Here are a few steps you should expect from them:

  1. Inspection and Assessment: A thorough inspection assesses the damage’s extent. Your roofing contractor and insurance representative will document the inspection through photos, videos, and notes. 
  2. Documentation: Detailed documentation, including photographs and notes, is crucial. This helps provide evidence for insurance claims and ensures all damage is accounted for. The photos and documentation will be made available to you for review.   
  3. Temporary Repairs: If the damage is severe and immediate repairs are necessary to prevent further damage, roofers might perform temporary fixes. This could include covering holes with tarps or applying sealant to stop leaks.

Get a roof replacement estimate

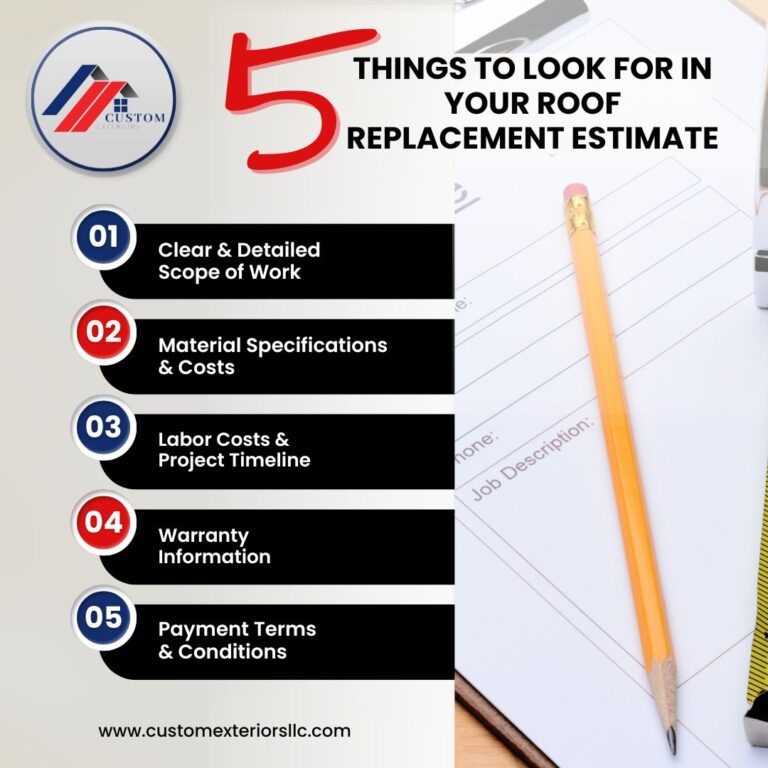
Infographic created by Custom Exteriors detailing 5 things you should look for in your hail damage roof replacement estimate

While waiting for the adjuster, getting an estimate from your roofing contractor is wise. These estimates will give you a sense of the repair costs and can be useful in negotiations with your insurance company. Make sure the contractors are experienced in handling insurance claims and can provide photographs and detailed, itemized quotes.

The estimate should be clear and concise, covering each aspect of the project in detail. It is important to remember that in Colorado, it is against the law for a homeowner to profit from an insurance claim. With this in mind, rather than focusing on the cost, focus on the contractor and their ability to complete your roof replacement. Pricing will be negotiated between the insurance company and the roofing company. Your out-of-pocket costs will be the same whether you choose the best contractor in town or the fly-by-night guy from out of state. With this in mind, use the contractor you like the most, not just the cheapest. 

File Your Insurance Claim

With your contractors’ estimates in hand, you can formally file your insurance claim. Submit all required documentation and ensure that your claim form is complete and accurate. Keep copies of everything for your records.

Once your claim is processed, your insurance company will make a settlement offer. Review this offer carefully and ask for input from your roofing contractor for any questions. If it adequately covers the necessary repairs, you can hire a contractor to fix your roof. You can negotiate or appeal the decision if you believe the offer is too low. At Custom Exteriors, we help our customers negotiate with their insurance companies and ensure their home is fully restored when we complete repairs. 

Complete The repairs

After agreeing on a settlement, sign a contract and hire the contractor to do the repairs. Ensure the work is completed to your satisfaction before making the final payment. Keep all receipts and documentation related to the repairs, as you may need them for future reference or additional claims.
Here is what to expect from your roofer during this time:

  1. Total Roof Replacement or Repair: Contractors should be careful not to damage your siding and landscaping during this process, keep open communication about the next steps, and thoroughly clean up the site afterward.
  2. Repair or Replace Damaged Roof Flashings and Gutters: Roofers should also repair or replace damaged flashing and gutters. Flashing around chimneys, vents, and skylights can be particularly vulnerable to hail, and repairing these areas is crucial to prevent leaks.
  3. Passing a Final Inspection: Once repairs are completed, a final inspection by your insurance company and/or city or county municipality ensures that all damage has been addressed and that the roof is in good condition. This also provides an opportunity to make sure the repairs meet both the homeowner’s and insurance company’s standards.

Stay Prepared

Hailstorms are a recurring issue in our area, so staying prepared is essential. Regular maintenance and inspections can help identify potential problems before they become major issues. Additionally, keeping your insurance policy up to date and understanding your coverage will ensure you’re ready for any future incidents.
Filing a roofing insurance claim after hail damage can be a complex process, but having a trusted partner and taking it step by step can help you navigate it successfully. By assessing the damage, understanding your policy, and working closely with your insurance company and Custom Exteriors, you can ensure your home is repaired with good materials and workmanship.

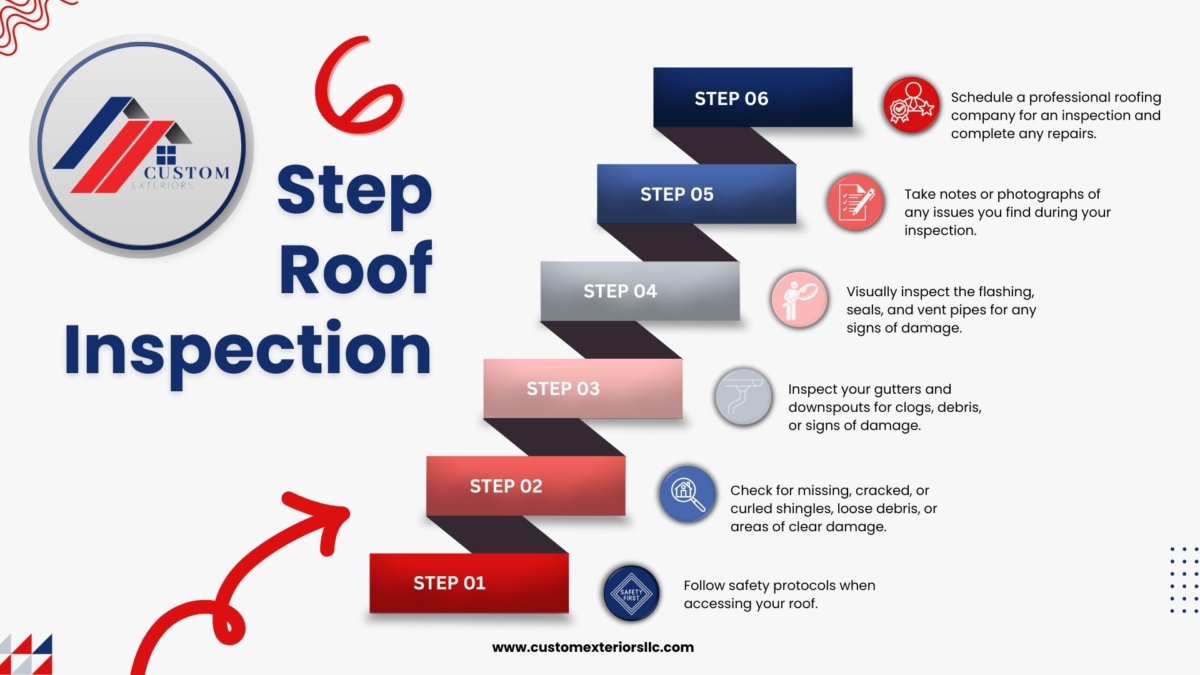
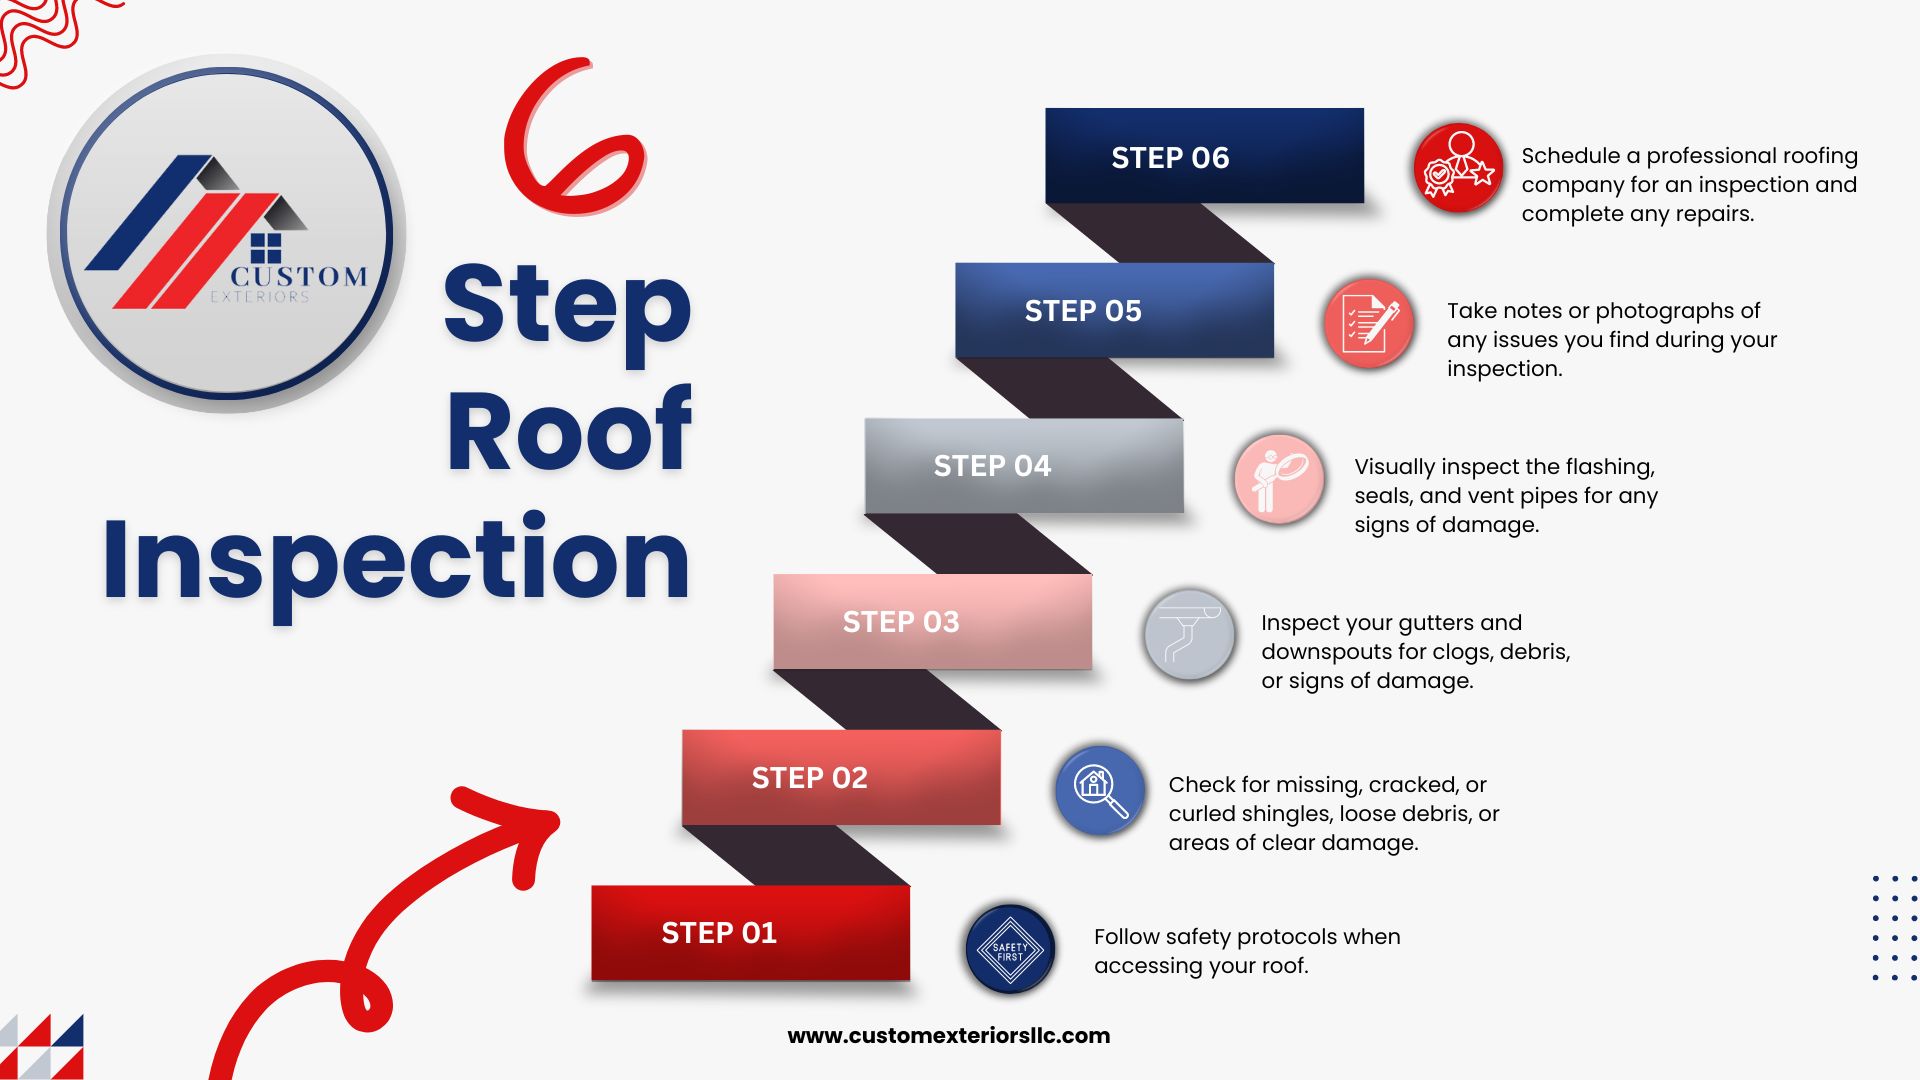
Infographic created by Custom Exteriors to explain the process they use when inspecting a roof

Important Tips For Roof Maintenance

Important tips for roof maintenance

Your roof is one of the most important systems of your home, and we aren’t just saying that because we are roofers. Your roof protects you and your family from Colorado’s extreme weather conditions year-round. Every season brings the potential for damage, from the strong hail storms we see in the summer to the heavy snow the winter occasionally brings. That doesn’t even consider the UV rays created by our 300+ days of sunshine. As local Colorado natives with decades of roofing experience, we have seen firsthand the impact our severe weather can have on our roofs.

If this experience has taught us anything, it is that regular roof maintenance is key to ensuring a long life and proper performance. Too often, we see roof leaks and other roof damage that could have been prevented if regular roof maintenance had been completed. From inspecting for damage to addressing minor repairs promptly, taking proactive steps can save you from costly, preventable damage. In this article, we’ll explore three essential tips for maintaining your roof, helping you extend its lifespan, and allowing it to protect your home for years to come. 

"Proactive roof maintenance costs an average of only 14¢ per square foot versus an average of 25¢ per square foot for reactive roof maintenance. Additionally, proactively maintained roofs last an average of 21 years compared to a 13-year average lifespan for roofs that only receive reactive maintenance."  ~ Buildings.com

Regular roof inspections by Custom Exteriors

Regular roof inspections

Roof inspections should be conducted at least once or twice a year, ideally in the spring and fall. This schedule sits on the shoulders of Colorado’s severe weather season. By inspecting your roof before hail season and before the threat of standing snow on a roof in the winter, you should be able to catch any roof damage early and help prevent costly repairs. During a roof inspection, professional roofers thoroughly inspect the roof and all its components, including shingles or roofing materials, flashing, vents, gutters, and the overall structural integrity of your roof. 

During your professional roof inspection, the roofer will look for signs of damage or wear during a roof inspection. This can include cracked or missing shingles, areas of discoloration or moss growth that could be signs of moisture problems, damaged flashings, sagging areas that could mean underlying structural issues, and debris buildup in gutters or on the roof surface. 

Another item they check during a roof inspection is the condition of the caulking and seals surrounding vents, pipes, skylights, and other penetrations, looking for signs of potential leaks. They will then assess the overall ventilation system to ensure proper airflow and moisture control. Identifying and addressing roof damage quickly can prevent leaks and water damage – very expensive repairs. 

Roof inspections by Custom Exteriors: Our roof inspection process

Roof inspections require a certain level of skill, knowledge, and physical abilities. Due to the inherent risks associated with roof inspections, we encourage our customers to use a professional for regular inspections. 

However, if you are going to inspect your own roof, the steps below encompass the residential roof inspection process by Custom Exteriors. There are some simple things to look for that can catch potential issues early and ensure the roof remains in good condition. 

Safety First:

A fall from your roof can result in serious injury and death. With that in mind, prioritize your safety over everything else. Roof inspections are typically not a DIY project. However, if you have the proper athletic ability, non-slip shoes, and safety equipment, including a safety harness, you may be able to complete your roof inspection. Make special considerations if your roof is steep or high, as falls can happen more easily. 

If you are doing your own roof inspection, choose a sturdy ladder and practice standard ladder safety precautions when using it. Choose a day with good weather, little to no wind, and clear visibility. It’s always a good idea to have an assistant on the ground to “spot you” in case of an emergency. 

Exterior Inspections:

You can DIY a roof inspection from the ground using binoculars or a remote control drone. This allows you to get a closer look at the condition of your roof from the safety of the ground. We start our inspections by walking around the exterior of your home and visually inspecting the roof from the ground. We look for visible signs of: 

  1. Missing, Cracked, Or Curled Shingles
  2. Areas Of Discoloration
  3. Debris Build-up

During this time, we will also inspect other home systems. During times of severe weather, particularly hail, many exterior systems are prone to damage, including your windows, siding, gutters, and even your personal exterior property. Our HAAG-certified roofing inspectors will check your windows for signs of damage to the screens or the frames. (Screens are a great DIY project! Learn how to replace your screens with us!) They will look for signs of damage to your siding or paint, gutters, A/C unit, and your personal property. 

Check Gutters and downspouts:

Inspect gutters and downspouts for clogs, debris accumulation, or signs of damage. When conducting a fall inspection, it’s a great idea to wait until your leaves have fallen to ensure your gutters are clear and can drain any heavy snow experienced during the winter. Clogged gutters can lead to ice dams. An ice dam freezes on the home’s eave with colder temperatures, sealing the melting water above and creating potential roof leaks. Your gutters must be clear and functioning properly before severe weather. The next section of the article covers gutter maintenance. 

Inspect Flashing, Seals, Caulking, and interior penetrations:

We then check the flashings around the chimneys, vents, skylights, and other roof penetrations for signs of loose or damaged flashing, cracked seals and caulking, or gaps that could allow water infiltration. 

It’s also important to check the vent pipes for any signs of damage, such as cracks, gaps, or deterioration. Check that vent pipe boots (the flashing around vent pipes) are in good condition and properly sealed to prevent water leaks. 

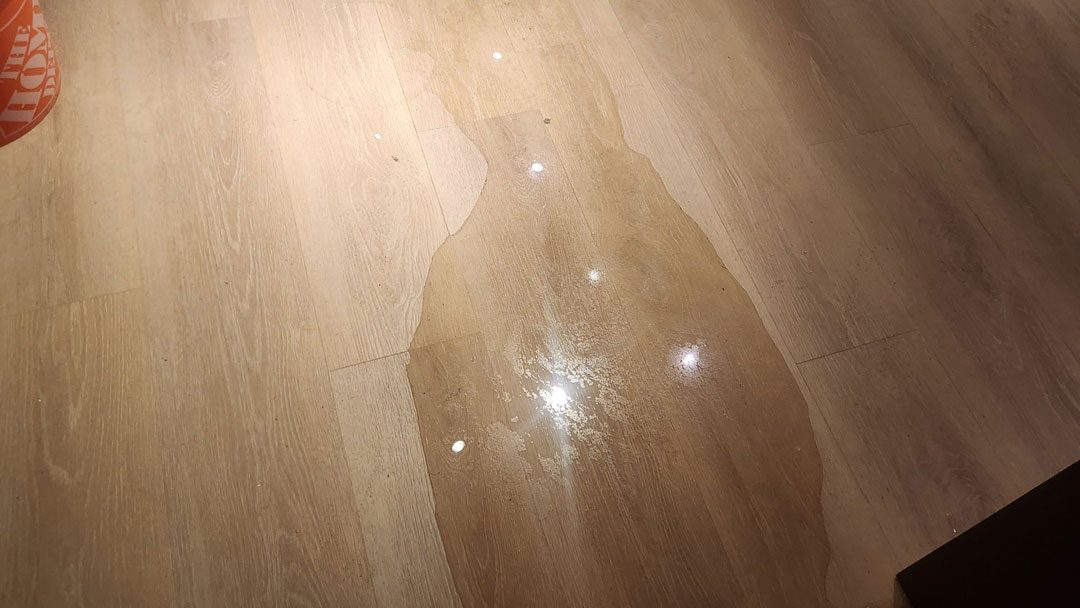
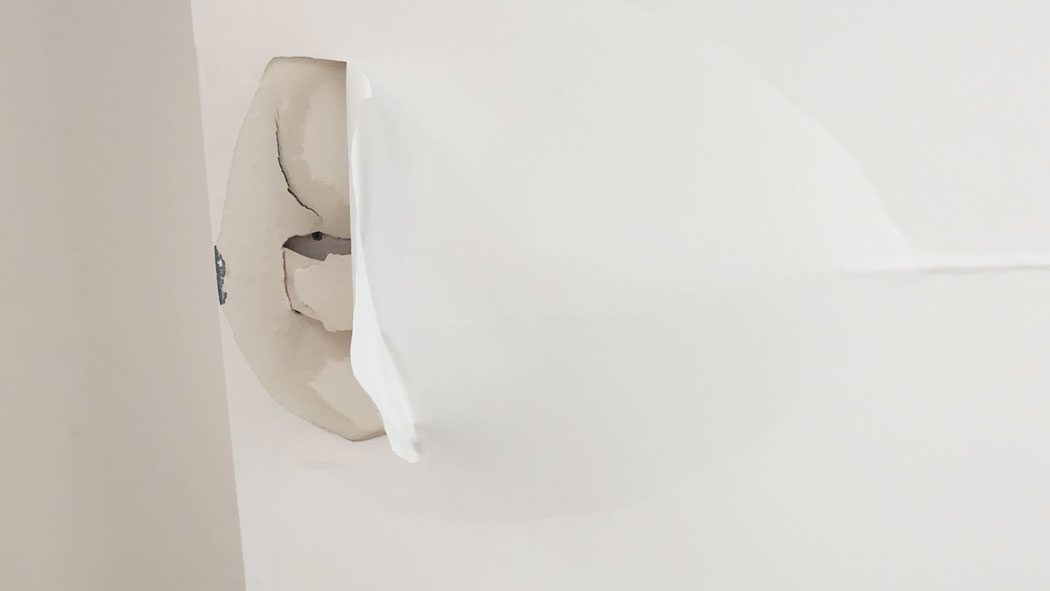
Lastly, if safely possible, we inspect your attic for signs of water leaks, moisture, or mold growth. We look for water stains on the ceiling, damp insulation, or visible light through the roof boards, which could indicate roof damage. During this interior inspection, we can usually see the roof decking. Identifying if you have spaced roof decking and the insurance coverage to cover it before it is removed can prevent stress during your roof replacement. 

Document any roof damage:

During each portion of our inspection, we take notes, photographs, and videos of any issues found during the roof inspection. This documentation can be helpful when discussing repairs with your homeowner’s insurance and roofing professionals

Schedule a professional for roof repairs:

While some homeowners can perform a roof inspection themselves, it’s a good idea to schedule a professional roofer for any repairs. Having a professional inspection at least once a year or after severe weather, such as hail, is recommended. Professional roofers have the expertise and tools to conduct a thorough inspection and address any repairs immediately. 

Infographic created by Custom Exteriors to explain the process they use when inspecting a roof

By regularly inspecting your roof and quickly addressing minor issues, you can increase its lifespan and avoid expensive repairs or replacements in the long run. If you’re ever unsure or uncomfortable inspecting your roof yourself, don’t hesitate to contact a qualified roofing professional for help. This is an excellent opportunity to build a working relationship with a trusted local professional in case you ever need a full roof replacement. 

The role of gutter maintenance in proper roof care

Here is a step-by-step guide on gutter cleaning to get you started: 

  1. Safety Precautions: Safety should be your first priority with all exterior maintenance. Before beginning, make sure you have the physical ability to complete the project safely. You should know and practice good ladder safety and always have someone spot you while using a ladder, especially if you’re working at a considerable height. If you doubt your ability to complete this project safely, it’s best to leave it to a professional with the experience and equipment to complete it safely and efficiently. 
  2. Gather Your Tools: Before starting, gather work gloves, a bucket or trash bag, a gutter scoop or trowel, a garden hose with a spray nozzle, and safety glasses. You will also need a sturdy ladder placed on stable ground and extended sufficiently to reach past the gutters comfortably. 
  3. Start At The Downspout: Begin near the downspout and work your way along the length of the gutter. Use the scoop or trowel to remove leaves, twigs, and debris from the gutter channel. Place the debris in your bucket or trash bag. 
  4. Clear Blockages: If you find any clogs or obstructions in the gutter or downspout, use the gutter scoop, a plumber’s snake, or a garden hose to dislodge and remove the blockage. Once you have cleared the blockage, test that the water can flow freely through the downspout. 
  5. Flush The Gutters: Once you’ve cleared the debris, use a garden hose with a spray nozzle to flush out the gutters. Start at the end farthest from the downspout and work your way towards it. This helps wash away remaining debris and check for proper water flow. 
  6. Check Downspouts And Extensions: Inspect the downspouts and extensions for any clogs or blockages. Use a hose to flush water through the downspout and ensure it drains away from your home’s foundation. 
  7. Inspect The Gutters And Roof: While cleaning, inspect the gutters and roof for signs of damage or wear. Look for loose or damaged gutters, missing or damaged shingles, and any areas where water may be pooling or leaking. 
  8. Dispose Of Debris: Avoid dumping debris near storm drains or in areas that could cause drainage problems. Dispose of the gutter debris responsibly. 
  9. Schedule Regular Maintenance: To prevent future clogs and water damage, schedule regular gutter cleaning at least twice a year, preferably in the spring and fall. Consider whether gutter guards or screens reduce debris build-up and impact maintenance needs. 

Following these steps can help ensure that your gutters remain clear and functional, protecting your home from water damage and maintaining the roof and exterior. 

Find a Local roofing company you can trust and enjoy the benefits of proper roof maintenance.

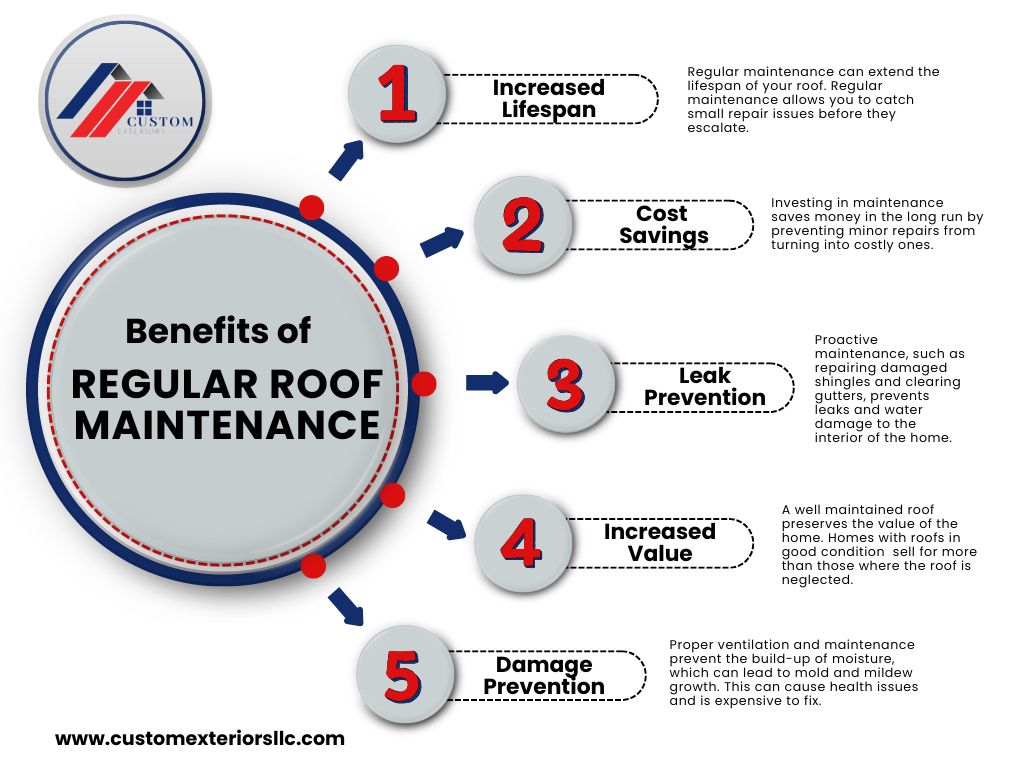
Infographic created by Custom Exteriors explaining 5 benefits of regular roof maintenance

The benefits of regular roof maintenance can be both financial and aesthetic. However, you need a trustworthy roofing contractor to see any of these rewards. Using a professional roofing contractor for your roof maintenance, repairs, and inspections offers numerous benefits in addition to not having to do it yourself! Professional roofing contractors have the expertise, experience, and knowledge required to inspect and assess the condition of your roof. They can identify potential issues, such as damaged shingles, leaks, or structural weaknesses, which may not be apparent to an untrained eye. 

Another key benefit of hiring a professional roofing contractor is the quality of workmanship and materials used. Contractors have access to high-quality roofing materials and tools that may not be readily available to homeowners. So, whether replacing damaged shingles, repairing flashing, or addressing ventilation issues, professional roofers will ensure your repairs are done correctly and up to industry standards. Local roofing professionals know building codes, regulations, and safety practices.

Establishing a relationship if you’re hit by hail and need a full roof replacement is also a great idea. Local roofing companies often provide warranties and guarantees on their work that you may not otherwise get. If issues arise after repairs or maintenance, reputable contractors will stand behind their work and are responsive to address any concerns. 

Overall, partnering with a professional roofing contractor for your roof maintenance, repairs, and inspections is an investment in your roof’s long-term health and performance. 

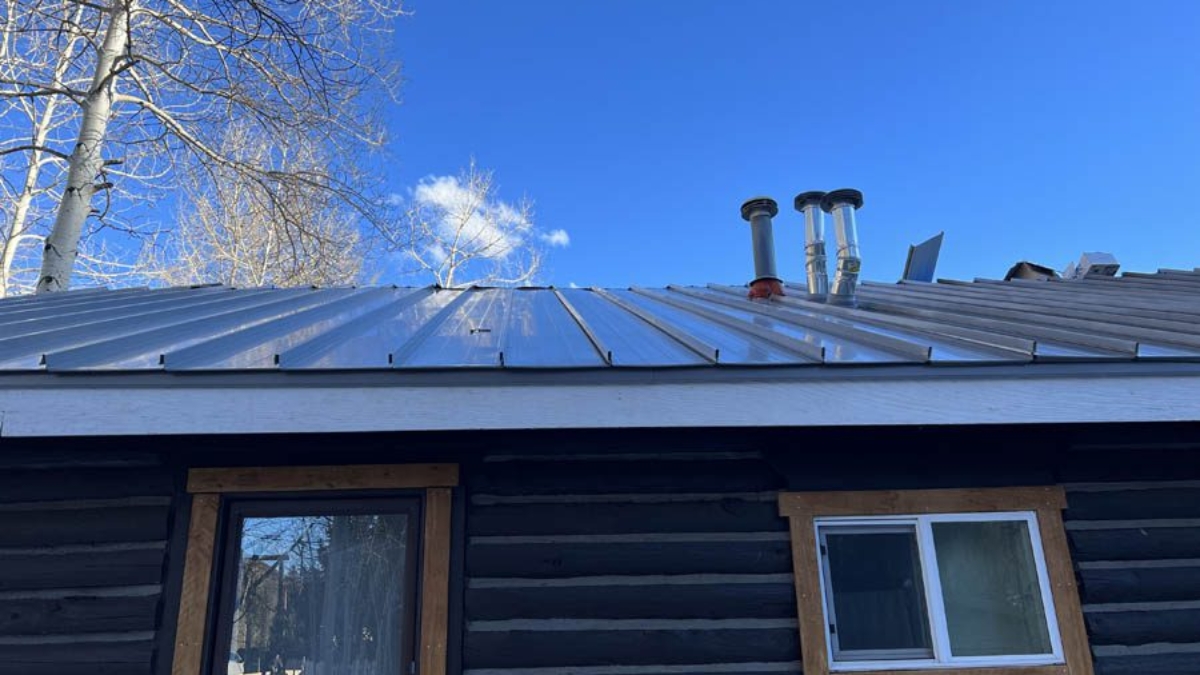
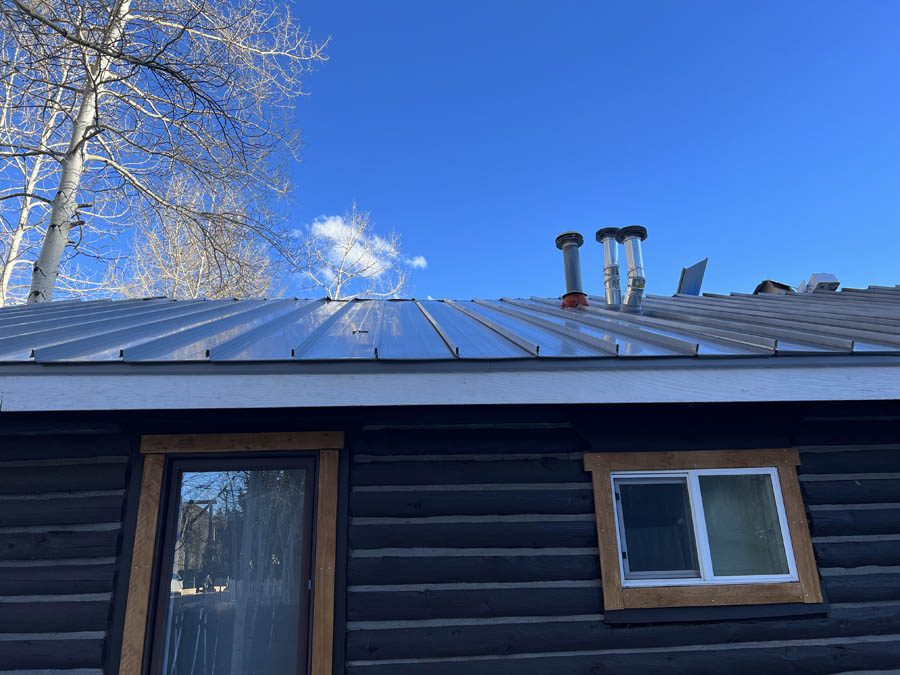
Metal roof installed by Custom Exteriors

Asphalt Shingle Roofs vs. Metal Roofs: A Comprehensive Comparison

Metal Roofs Vs. Asphalt shingle roofs:
A comprehensive comparison

As a roofing contractor based out of Colorado, we often meet our customers during stressful times. Their home or business has often been damaged by severe weather, and now they are in the middle of negotiations with insurance companies and scheduling contractors for repairs. This doesn’t even consider the decisions that must be made during a roof replacement, including color and design choices. Choosing the right roofing material will affect your property’s long-term comfort, protection, and value. We have seen just about every roofing system around. They all have advantages and disadvantages, so how do you choose the right one? It helps to understand the critical differences between the systems. Let’s look at two widely used options: metal and asphalt shingle roofs. 

Many factors, such as durability and lifespan, should be considered when replacing your roof. In this article, we are going to discuss the following factors that will likely affect your final decision:

When choosing between these two popular roofing materials, it’s essential to consider your budget, climate, and long-term goals. This will help you to make an informed decision that best suits your property’s needs. 

The battle of durability

Metal roofs are known for their exceptional longevity, often lasting 40 to 70 years or more! They can brave harsh weather and require minimal maintenance. However, they can be prone to denting if something heavy falls on them or during large hail storms. On the other hand, asphalt shingle roofs are budget-friendly initially but typically only last 20 to 30 years. Additionally, they are more vulnerable to extreme weather conditions and demand regular maintenance

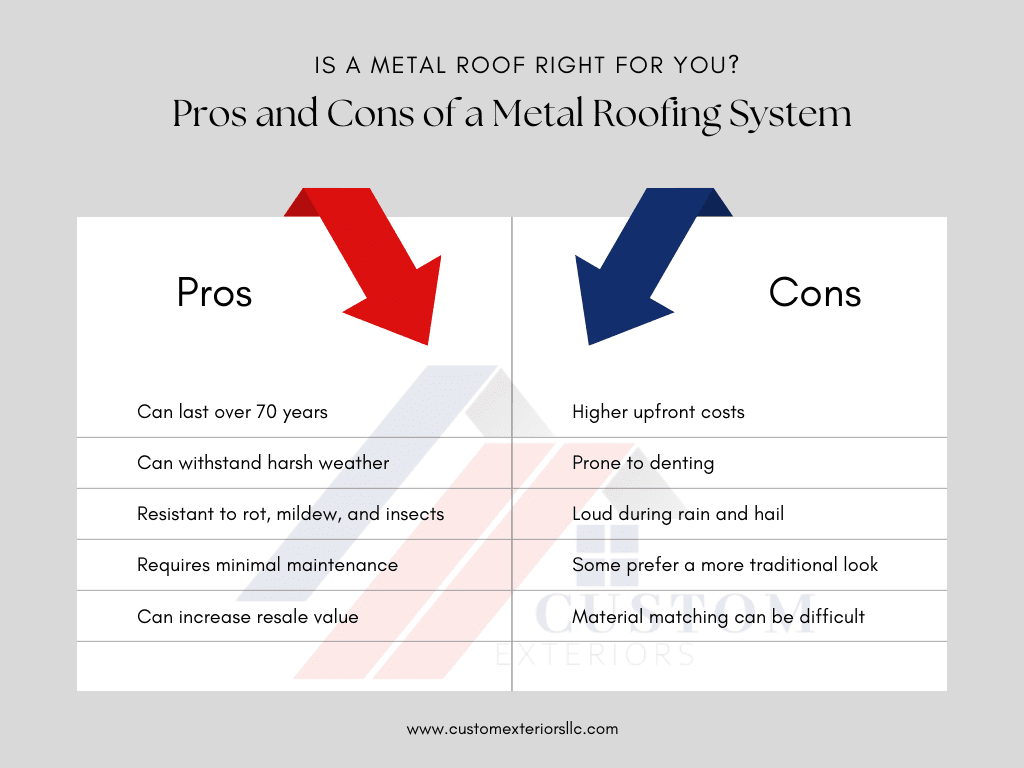
Infographic made by Custom Exteriors to explain the pros and cons of metal roofing

Metal Roofs: Built to last

Metal roofs are known for being quite durable, so they are often considered a long-term investment. When properly installed and maintained, metal roofs can last up to 70 years, if not longer. This impressive lifespan is due to the basic make-up of metal. Metal roofing materials, such as steel, aluminum, and copper, naturally resist wear and tear caused by weather exposure and age. 

One of the standout features of metal roofing is its ability to withstand a wide range of harsh weather conditions. Snow and ice typically slide off a metal roof more efficiently, reducing the risk of ice dams and the associated water damage during cold winters. They also won’t rot, warp, or crack and cannot be damaged by mildew and mold. This resilience means fewer maintenance requirements and lower long-term repair costs.

It’s worth mentioning that while metal roofs are incredibly durable, they can be dented if something heavy, like a tree limb, falls on them or during extreme hail. However, generally speaking, metal roofing is quite difficult to damage. 

Asphalt Shingle Roofs: A dependable option

Asphalt shingle roofs are not as durable as metal roofs. However, with decent long-term maintenance, they offer a respectable life span of 20 to 30 years. It is important to note that the lifespan of an asphalt roof can vary significantly depending on climate, weather exposure, shingle quality, and maintenance. 

Asphalt shingles are a popular choice due to their affordability. While they have many desirable qualities, it’s crucial to consider their limitations. While they can hold up well in mild to moderate weather conditions, they are more susceptible to damage from severe weather events like hurricanes, hailstorms, and high winds. Over time, the asphalt shingles can become brittle and crack due to prolonged exposure to the sun’s ultraviolet (UV) rays, potentially leading to leaks. With this in mind, before choosing your roofing material, consider the weather conditions in your area. Homeowners in areas prone to severe weather may benefit from the long-term investment of a metal roofing system. 

Asphalt shingles can deteriorate quickly in regions with extreme temperature fluctuations. In areas prone to heavy snowfall, the weight of accumulated snow and ice can cause damage to the shingles and surrounding roof components

To maintain a long lifespan with your asphalt shingle roof, homeowners must be diligent about regular roof inspections, repairs, and occasional replacements of damaged or missing shingles. This ongoing maintenance, while necessary, can add to the long-term cost of an asphalt shingle roof. 

The installation process

Understanding the installation process of metal and asphalt shingle roofs is crucial to making an informed choice for your home. Both options have aspects of installation that can impact your budget and timeline. 

Commercial roof replacement by Longmont roofing contractor Custom Exteriors

Metal Roofs: More complex with more reward

Metal roof installations typically involve more complexity than asphalt shingle roofs, but the benefits can outweigh the challenges. 

After checking the roof decking for any signs of damage, the installation process begins using an underlayment like ice-and-water shield. Layers are overlapped and laid down wrinkle-free. Metal panels are then often cut to the length of the roof. This avoids seams in the roof, which can be a source of potential leaks. The panels are then stuck to closure strips and attached to the roof. The panels and trim pieces are installed with screws installed in a way designed to ensure the roof remains watertight.  During installation, the panels are overlapped as an additional way to prevent roof leaks. Trim pieces and ridge cap are then attached to the other roof components like your ridge, gable, and eave. Metal roof installations often require professional installation because their installation methods are more complex.

When you replace your roof with a metal roofing system, an experienced roofer will be able to install your new roof efficiently. This means less disruption to your daily life during the installation process. This efficiency can translate to short installation times. However, because of the specialized knowledge required to install your roof, your labor costs can be higher than with an asphalt roof replacement. Additionally, incorrect installation can result in issues like leaks or rust over time. Therefore, when choosing a metal roof, it’s essential to hire a qualified roofing contractor with experience in metal roofing installation. 

While metal roof installation may have a few additional considerations, the longevity and durability of the roof make it a worthwhile investment. 

Asphalt Shingle Roofs: Simple and familiar

Asphalt shingle roof installation is generally more straightforward and familiar to most roofing contractors. The installation process for asphalt shingle roofs is more straightforward and requires fewer specialized tools than metal roofs as well. Most roofing professionals are qualified to install asphalt shingle roofs. The installation of asphalt shingles is typically faster than metal roofs. The process of deck inspections and underlayment is similar. However, asphalt shingles are nailed to the surface of the roof. When installing asphalt shingles, knowledge of required nail patterns and shingle layout is essential. 

Proper installation of roof vents and flashing is essential for preventing leaks in the long term. Ensuring these components are correctly installed may require extra attention. Regardless of your roofing material choice, working with a reputable roofing contractor specializing in your selected roofing material is crucial to ensure a successful and long-lasting installation. 


Cost Considerations

When replacing your roof, understanding the costs associated is a key factor in making an intelligent choice that meets your needs and your budget, not just now, but in the future as well. 

Metal Roofs: A Long-term investment

Asphalt Shingle roofs: Budget-friendly upfront

When thinking about cost, you’ll need to balance your immediate budget constraints with your long-term financial goals. Metal roofs may require a larger initial investment, but their durability and potential energy savings can make them a wise financial choice in the long run. On the other hand, asphalt shingle roofs are more affordable upfront, making them a suitable option if you need to manage your costs in the short term. Weigh your budget and future plans carefully and make an informed decision about your roof replacement. 

The environmental impact

Making eco-friendly choices is increasingly important. The production and shipping of both systems do have a carbon footprint. However, metal roofing materials are often recyclable at the end of their lifespan. In addition to traditional recycling methods, recently, used metal roofing has become a stylish wall covering that is highly in demand. Additionally, because of the reflective properties of metal roofing, it has the potential to reduce the energy costs of the home. 

Asphalt shingles may contain recycled materials and can sometimes be recycled. However, because they don’t serve as well to reflect the sun’s heat, they contribute to the urban heat island effect. Additionally, they are more energy-intensive to manufacture. 
Curb appeal

The appearance of your roof plays a surprisingly significant role in the overall look and curb appeal of your home. So, when choosing between metal and asphalt shingle roofs, it’s essential to consider how each material will look with your home’s style. Some things to consider when choosing the best match for your home are:

When choosing a new roof, the most significant impact is achieved by considering your home’s architectural style, personal preferences, and even the roofs of surrounding homes and buildings. Metal roofs provide a contemporary and customizable look, ideal for those seeking a modern appearance. On the other hand, asphalt shingle roofs offer a timeless and classic charm, making them a reliable choice for homeowners who prefer a more traditional look.

It’s important to remember that your roofing decision should complement the overall design of your home. So, take the time to explore different styles and colors, and consult with your roofing contractor for expert guidance. Ultimately, the goal is to have a roof that not only protects your home but also enhances its curb appeal and character.

Maintenance and repairs

Proper maintenance and timely repairs are essential for prolonging your roof’s lifespan. Metal roofs require minimal maintenance, usually limited to occasional inspections and cleaning. Repairs are generally straightforward, often involving patching or resealing. On the other hand, asphalt shingle roofs demand more frequent inspections and maintenance, which can become time-consuming and costly over time. However, damaged shingles can be replaced individually, reducing repair costs. 

Metal roofs: Minimal Maintenance, straightforward repairs

One of the appealing aspects of metal roofs is their minimal maintenance requirements. Regular inspections to check for loose fasteners, damaged sealant, or debris in valleys are usually sufficient to keep your roof in good shape. Metal roofs are highly resistant to common roofing issues like rot, mildew, and insect damage, reducing the need for extensive maintenance. If your metal roof does require repairs, they are generally straightforward and can often be handled by a professional roofing contractor. Typical repairs include patching mall areas or resealing seams and fasteners. 

However, it’s important to note that finding matching materials for repairs can be challenging if your metal roof is older, as the specific material and color may no longer be available. This could cause an inconsistent look across your roof. 

Asphalt Shingle roofs: Regular maintenance and repairs

Asphalt shingle roofs require more regular maintenance than metal roofs. Routine inspections are essential to identify damaged or missing shingles, issues with flashing, and signs of wear. Timely detection can prevent more extensive damage. One advantage of asphalt shingle roofs is that damaged shingles can often be replaced individually. This helps control costs, especially for minor repairs. While some repairs can be DIY-friendly, it’s good to seek professional assistance for complex repairs. Roof professionals have the experience and expertise to identify and address roofing issues effectively. If homeowners tackle roof maintenance themselves, their first concern should be safety. Consideration should be given to having proper safety equipment and using ladder safety and rooftop safety techniques. Physical limitations can restrict some homeowners from completing roof maintenance. 

Asphalt shingles require ongoing maintenance, including shingle replacement, sealing exposed nails, and addressing issues like curling or blistering shingles. Neglected shingles can lead to leaks and water damage to your home’s interior. Some repairs, such as fixing leaks around flashings or repairing extensive shingle damage, can be more complex and costly. 

Insider information

In the end, the choice between a metal roof and an asphalt shingle roof is a decision that should align with your budget, aesthetic preferences, and long-term goals for your home. Both materials have advantages and disadvantages, and the right choice depends on your unique circumstances. 

Before starting your roofing project, take the time to consult with a trusted roofing professional who can assess your specific needs, provide detailed estimates, and offer expert guidance. Their expertise will help you make an informed decision, ensuring your home remains safe, comfortable, and visually appealing for years. 

Remember that your roof is not just a functional component; it’s a crucial element of your home’s curb appeal and overall value. By considering the insider tips provided and weighing the pros and cons of each roofing material, you’ll be better equipped to make the right choice for your home and enjoy the benefits of a beautiful, durable, and long-lasting roof. Best of luck with your roofing project!

Additional Resources:

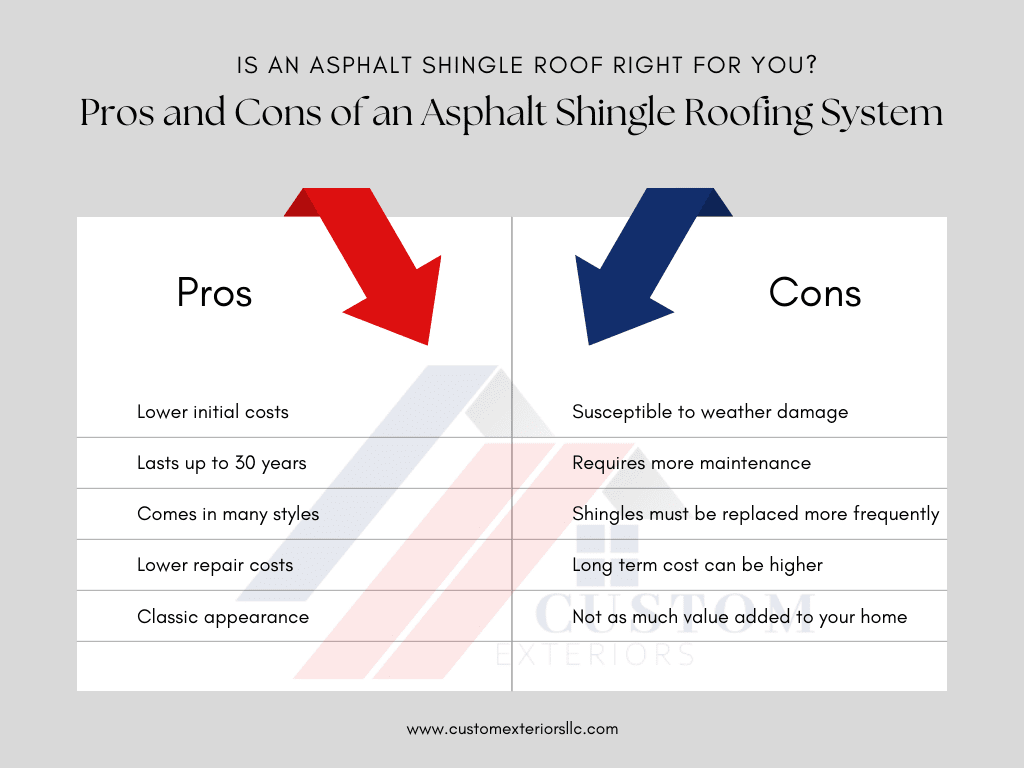
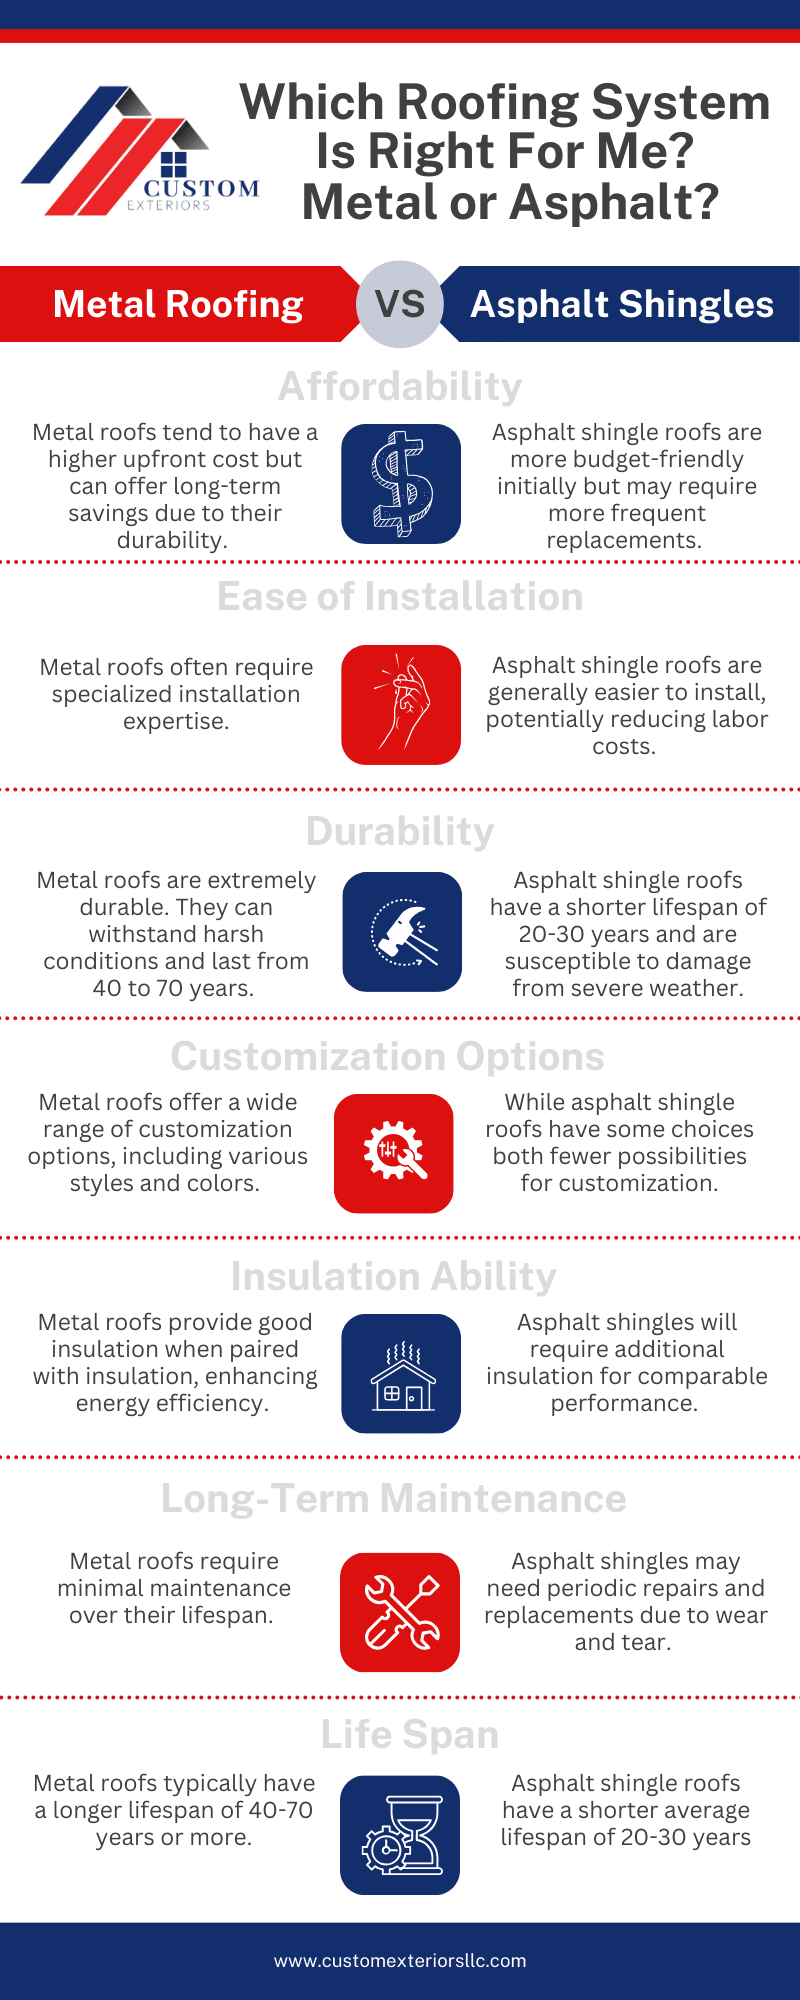
Infographic created by Custom Exteriors to show the major points when comparing an asphalt shingle and metal roof
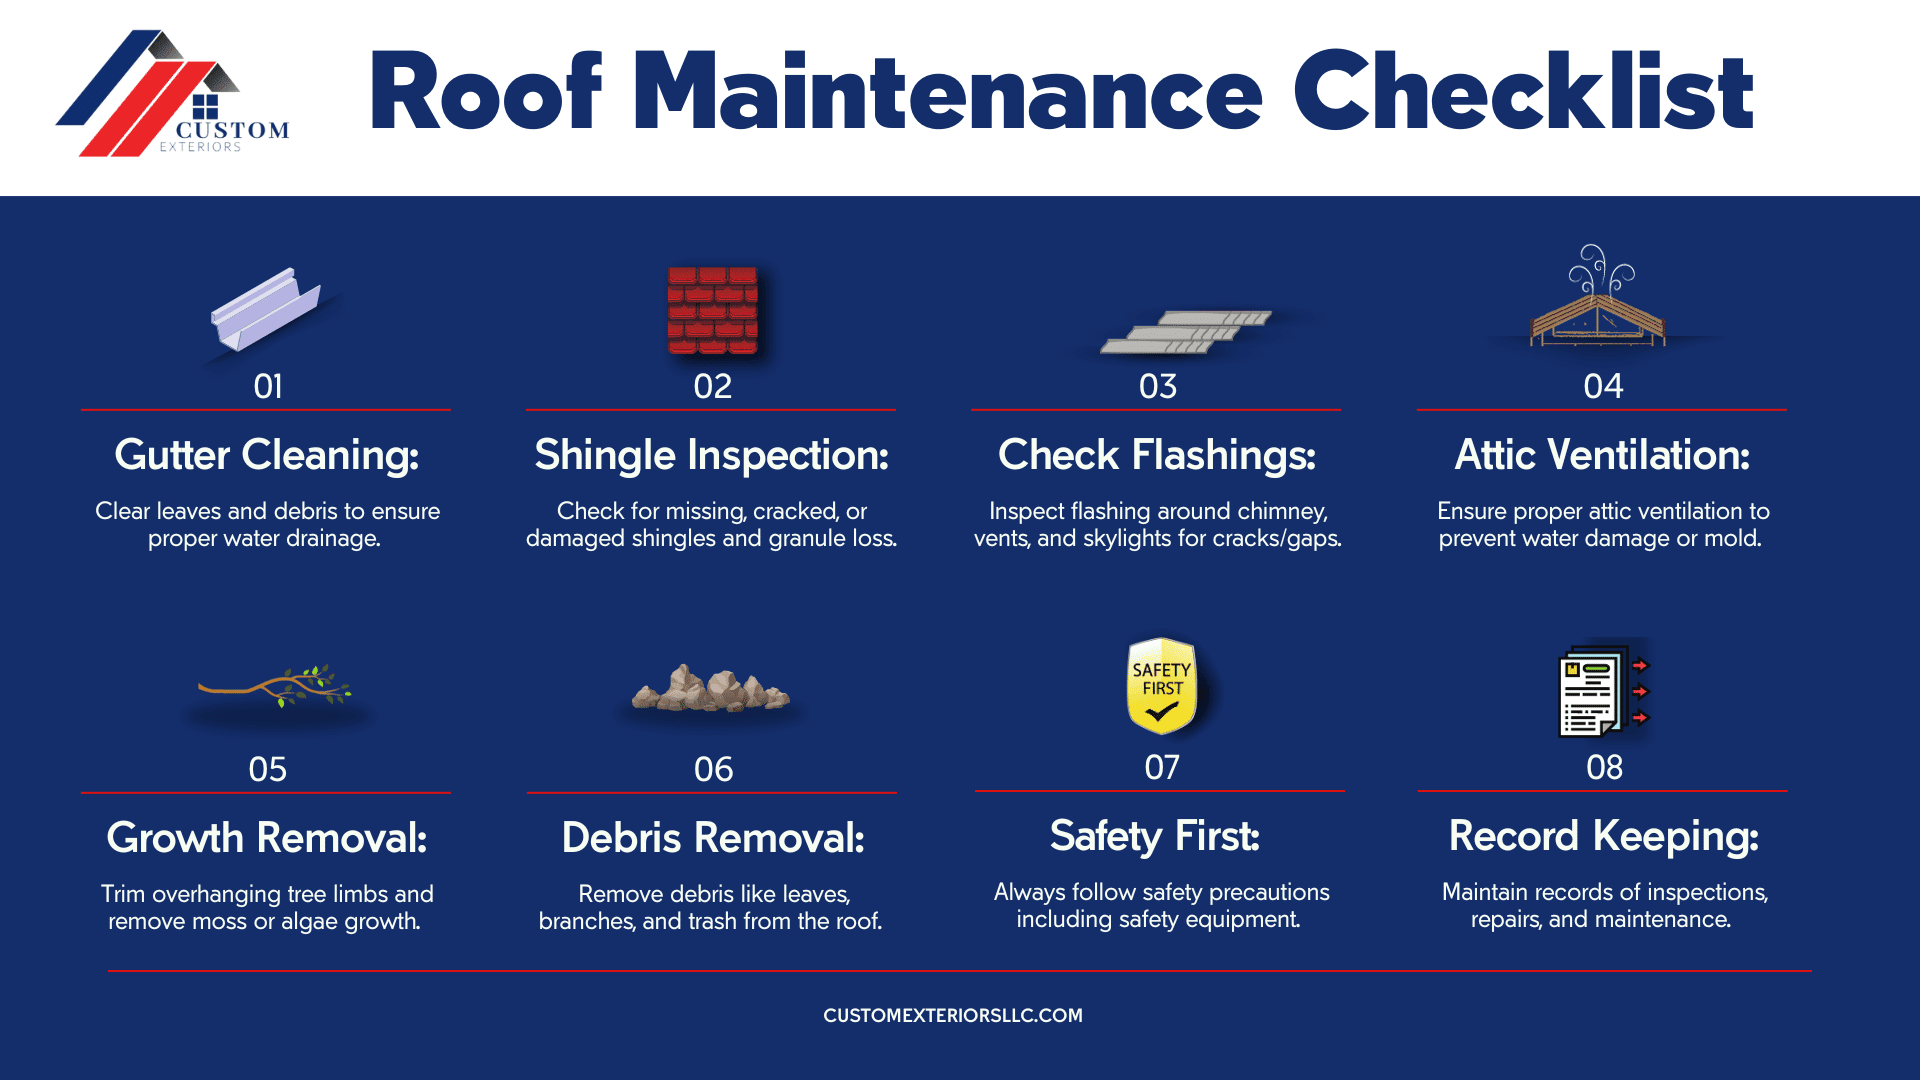
Infographic created by Custom Exteriors to provide a list of things that need to be checked regularly when inspecting your roof
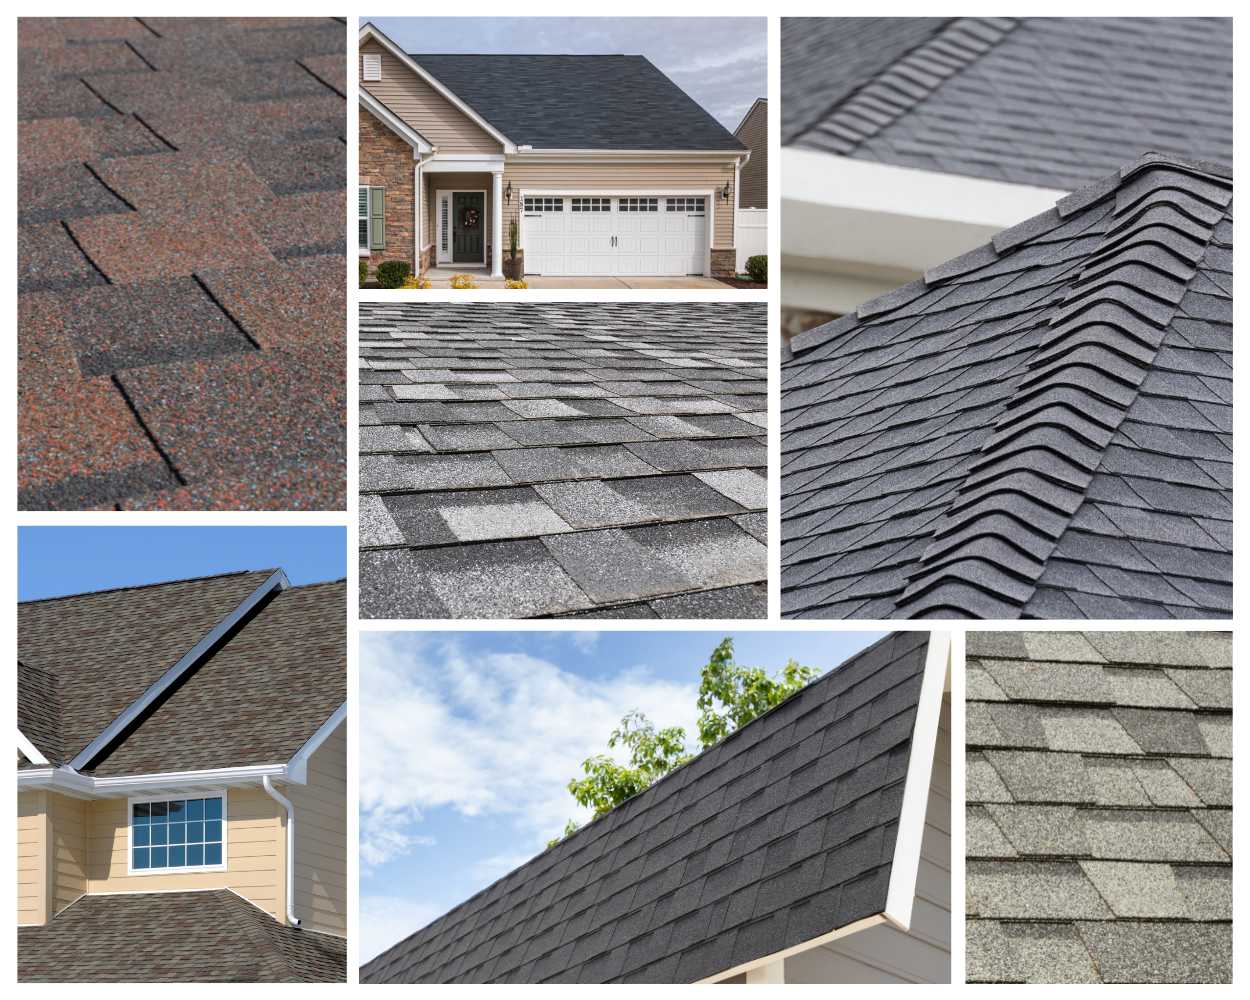
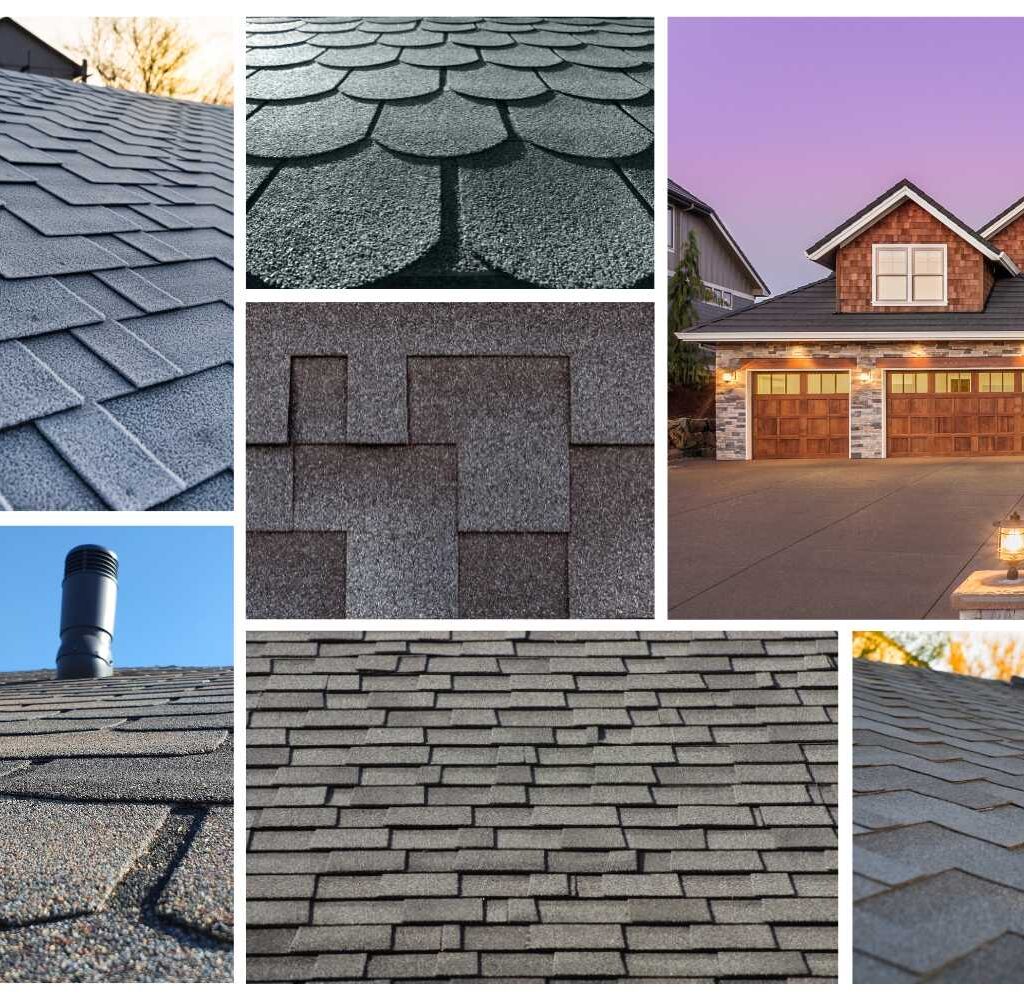
One of the many styles of asphalt shingles available for roof replacement

The Many Styles of Asphalt Shingles and Specialty Shingles

One of the many styles of asphalt shingles available for roof replacement

With all the styles of specialty and asphalt shingles, which roof replacement choice is right for you?

So, it’s time to replace your roof. Maybe you were hit with one of Colorado’s notorious winds or hailstorms. Or, your property has an aging roof. You may be just looking for a refresh on your home’s curb appeal. Your roof occupies a substantial portion of that first impression! Because of this, a new roof can completely change the look of your home from the exterior!

Keeping this in mind, when the time comes for a roof replacement, rather than just putting back on the same shingle removed, why not look at all the many asphalt shingle options? 

Today’s shingle market offers a wide array of styles and colors, from the classic three-tab asphalt shingles to the more luxurious designer options. While these designer shingles come with a higher price tag, they offer benefits such as increased durability, enhanced curb appeal, improved energy efficiency, and longer lifespan, making them a worthwhile investment. 

If you are in the market for a replacement roof, a skilled and local roofing contractor can tell you about each option’s advantages and disadvantages. This will, in turn, equip you with the knowledge to make an educated choice on the roofing system for your property. 

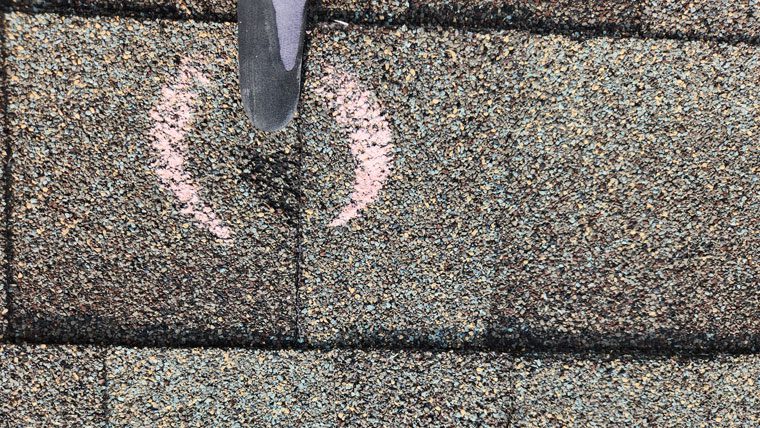
A photo taken during a roof inspection in Northern Colorado by Custom Exteriors showing the lack of wind resistance that three-tab shingles struggle with

Three Tab Asphalt Shingles

For years, the three-tab shingle was the affordable, available, easy option for residential roofs. It is the easiest shingle to install and serves the primary purpose that shingles are supposed to serve. While in reality, the three-tab shingles are not necessarily inferior to other styles of singles, they do have some limitations compared to other styles. These include: 

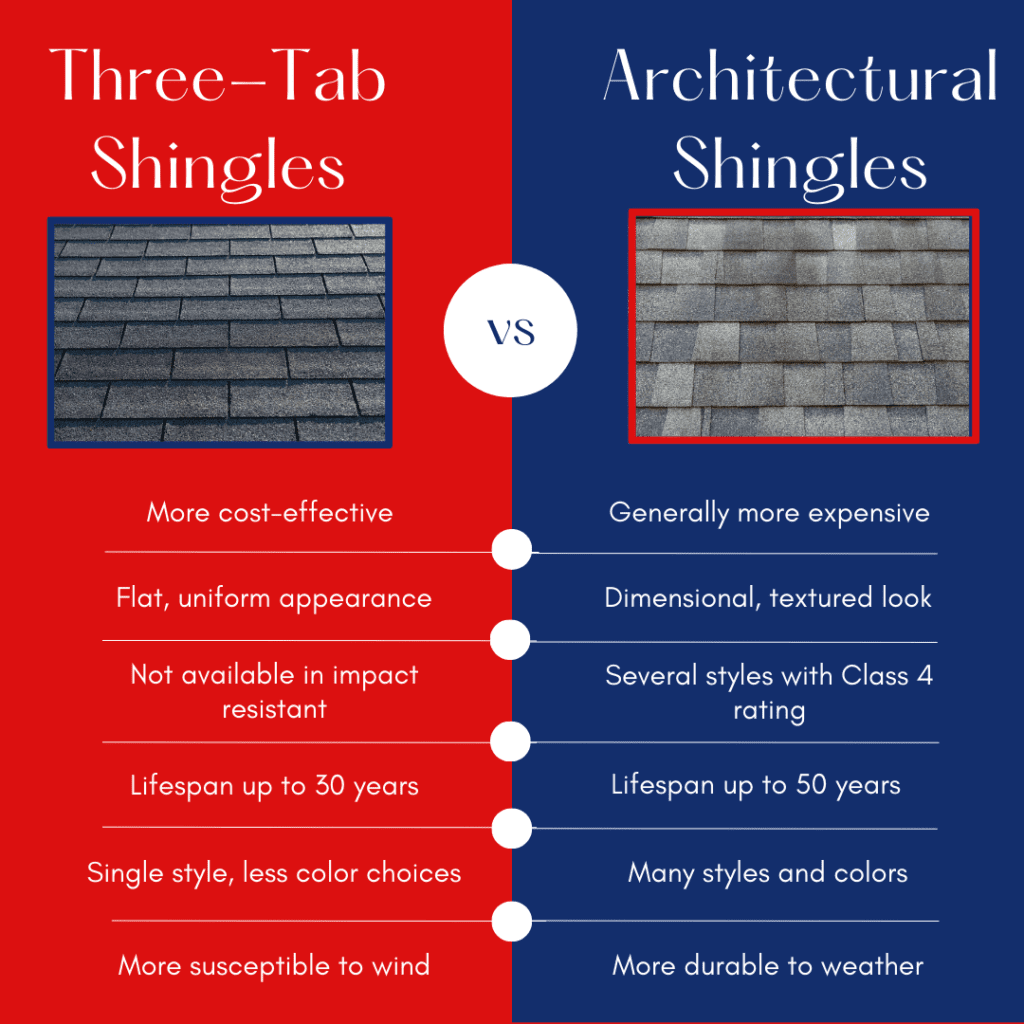
  1. Less Attractive: Three-tab shingles have less dimensionality than other styles. Because of this, they can have a flat, uniform appearance, which can make them less attractive. Additionally, this flat appearance can be less visually appealing than other shingles. 
  2.  Shorter Lifespan: Three-tab shingles often have a shorter lifespan. Three-tab shingles are typically thinner and less durable than other styles of shingles. Taking this into consideration means they may not last as long or provide as much protection against severe weather as other styles. 
  3.   Fewer Options: While there are limited color options, three-tab shingles still offer a variety of choices. Unfortunately, they have fewer options than other shingle styles, which may somewhat limit your design choices. 
  4.  Lower Wind Resistance: Finally, and most importantly, three-tab shingles have lower wind resistance. The picture above is from a local roof inspection we conducted recently. It shows how much easier three-tab shingles can sustain damage in severe weather events because they may not be as resistant to high winds. This is particularly important in places like the Colorado foothills or southern Wyoming, where the wind is known to be particularly strong on occasion. 

Moreover, at this time, the costs associated with a three-tab shingle vs. a standard architectural shingle are similar. However, the guidance of a professional roofing contractor is invaluable in understanding all the factors to consider when choosing a roofing system. 

Architectural Shingles

Architectural shingles, often called dimensional or laminate shingles, can significantly improve your home’s appearance, value, and durability. They have set a new standard in the roofing industry.

Unlike traditional three-tab shingles, these are designed to replicate the look of natural materials like wood or slate. The result is a roof that provides reliable performance and looks much more modern than the three-tab counterpart. 

Architectural shingles, with their multi-layer construction and premium materials, offer exceptional protection against wind, rain, UV rays, and extreme temperatures. This not only reduces the need for frequent repairs and replacements but also ensures a long-lasting roofing solution for homeowners. Key features of architectural shingles include:

Which is a better fit for you?

What sets architectural shingles apart is their layered composition. Each shingle consists of multiple layers of material bonded together, creating a three-dimensional effect. This not only adds visual depth but also enhances the shingle’s durability and ability to shed water effectively. The result is a roof that not only looks great but also performs exceptionally well, keeping your home safe and dry.

Styles of Architectual Shingles

Asphalt shingles come in a wide variety of styles, each offering unique benefits. Choosing the right style requires more than just aesthetic preference; it’s important to consider factors like durability, weather resistance, and budget. The most common types of architectural shingles are: 


Traditional Dimensional Shingles

Architectural shingle examples, traditional dimensional shingles
  1. Description: These are the most common type of architectural shingles. They feature a layered, dimensional appearance that mimics the look of natural wood shakes. They have a varied texture and shadow lines that add depth to the roof.
  2. Best For: Homes seeking a classic, versatile look that complements many architectural styles.
  3. Impact resistance: Architectural shingles are available in both Class 3 and Class 4 impact resistance. 

Luxury Shingles

Luxury asphalt shingles
  1. Description: Luxury shingles are designed to replicate the appearance of high-end roofing materials like slate or cedar shakes. They are thicker, more textured, and offer a more pronounced, refined appearance.
  2. Best For: High-end homes or those looking to achieve a more elegant, upscale look.
  3. Impact resistance: Luxury shingles are available in both Class 3 and Class 4 impact resistance. 

Consulting with a local roofing expert can help you find the perfect fit for your home’s design and your personal taste.

Whether you’re looking for classic elegance, luxurious details, or high-definition finishes, the available styles of architectural shingles can elevate your home’s exterior. These shingles are designed to replicate the look of materials like wood shakes, slate, or traditional shingles, allowing you to enhance your home’s curb appeal while complementing its architectural design. For instance, if your home has a traditional look, shingles that mimic cedar shakes could be ideal, while a more modern home might benefit from sleek, clean-lined shingles.

Beyond appearance, the durability and weather resistance of architectural shingles make them a smart investment. With varying levels of thickness and material composition, these shingles are built to withstand the elements, offering long-lasting protection against wind, rain, and UV rays. By carefully selecting the right style for your home’s needs, you can achieve both visual appeal and reliable performance, ensuring your home looks great and stays protected for years to come.

Your New Roof

First impressions matter; your roof is pivotal in defining your home’s curb appeal. Architectural shingles offer an array of styles, colors, and textures that allow you to customize your roof to complement your home’s architectural design perfectly. Whether you prefer wood’s rustic charm or slate’s elegance, these shingles let you create a roof that reflects your unique personality and taste. So, as you can see, choosing a new roof is more challenging than it seems.

 Your local roofing company can help you review your options and their pros and cons. Additionally, local roofing supply companies can provide samples of the actual product. If you are working with a roofing company, they can get these for you. You can also get the samples directly from the roofing supply if you still need to settle on a roofing contractor. 

Discover the benefits of architectural shingles firsthand – a harmonious blend of beauty, strength, and value that redefines your home’s exterior. Contact us today to schedule a consultation and take the first step toward upgrading your home with the extraordinary world of architectural shingles. Your roof deserves nothing less than perfection; with architectural shingles, that’s precisely what you’ll achieve. Regardless, when the time comes to replace your roof, take a moment and review the multitude of different asphalt shingle styles and colors. When you are the envy of the neighborhood, you can thank us! 

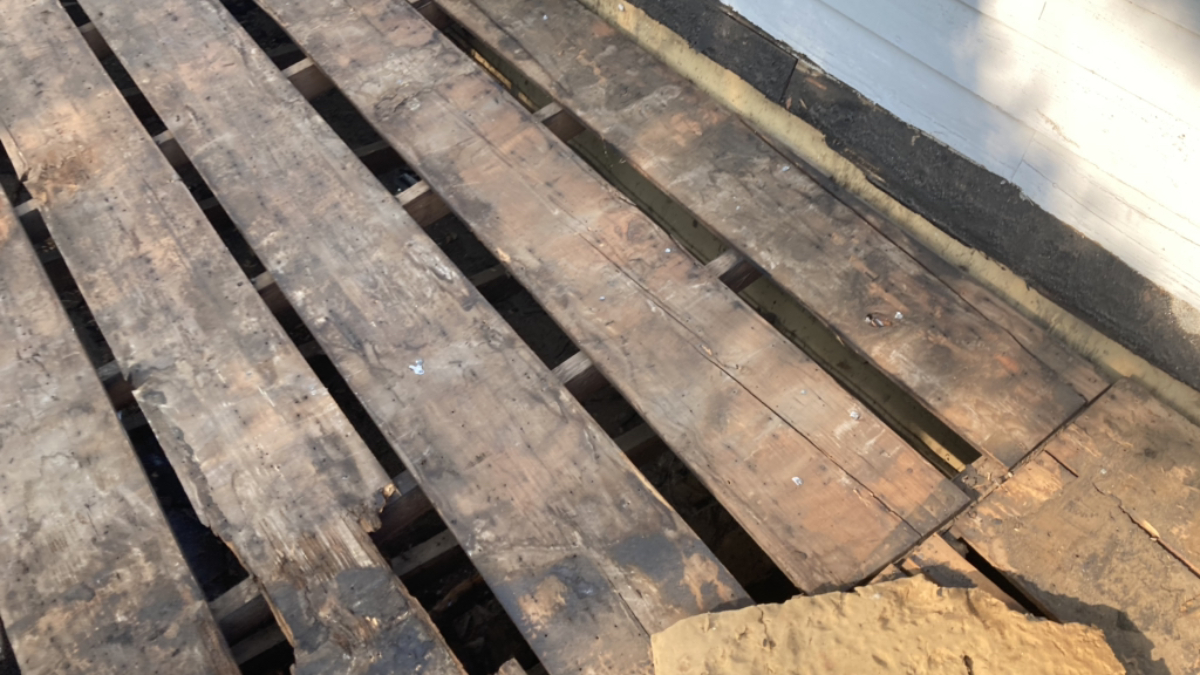
Spaced roof decking

What is Spaced Roof Decking?

Spaced roof decking

Exploring Spaced Roof Decking: What You Need To Know

Has your roofing contractor told you that you have “spaced roof decking”? Are you wondering what spaced decking is and why it matters if you have it? Look no further. We’re here to explain this occasional step of roof replacements. In this blog, we’ll dissect the significance of spaced roof decking and the key considerations you should keep in mind if you have it when replacing an asphalt shingle roof.

Spaced decking was once a common choice, especially in older houses. However, times have changed. Nowadays, builders opt for solid sheeting for roof decking. This shift is due to modern construction practices focusing on sturdiness and energy efficiency. Solid sheeting also minimizes the chances of excessive gaps, which can cause sagging or damage to your roofing materials. So, if you are being told you need to replace your “spaced roof decking,” it is in order for your roof to remain up to date with roofing codes.

 Whether you have an older home or are curious about the decking in new construction, understanding spaced decking’s possible issues is important. It could mean the difference between a sturdy roof and unexpected repairs down the line. We’re here to give you the insights to make informed decisions about your home’s roofing. So, let’s dive in!

What Do I Need To Know If I Have Spaced Decking?

What is Spaced Roof Decking?

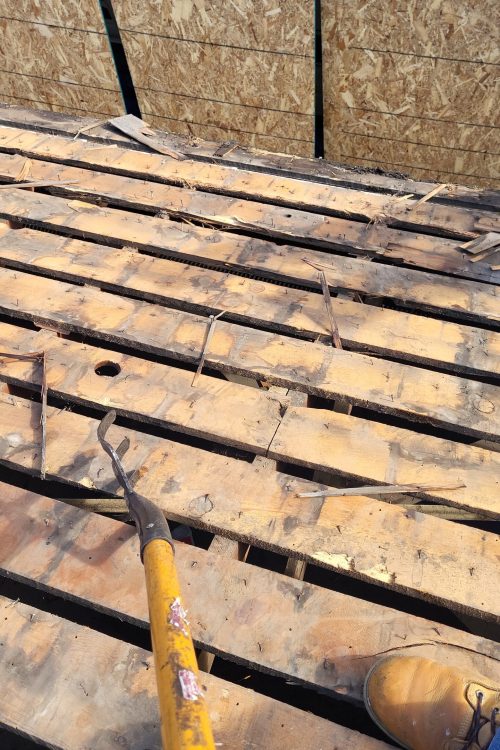
Spaced roof decking, or skip sheathing, is an older technique for installing roof decking. It uses boards installed with gaps or spaces between them. This type of decking was commonly used in the past. In the mid-20th century and earlier, solid wood decking was not readily available or affordable. 

The boards are typically placed perpendicular to the roof rafters in spaced roof decking. They are then spaced apart by a few inches. The gaps between the panels allowed for ventilation. However, spaced roof decking is not generally recommended for modern roof systems. This is because of reduced support, limited insulation, and an increased risk of leaks. While not always visible, your roof decking is an important component of your roof

While spaced, decking is not recommended for most modern roofing systems. It is, however, used for a few types of specialty roof installations. This includes shake and synthetic roofing systems. 

Solid wood decking provides better support, insulation, and protection against leaks. It has become more common for modern roof installations. Solid wood decking is made from materials such as plywood or OSB that are tightly placed together.

Spaced roof decking during roof replacement

Why Spaced Decking is No Longer Used in Roof Systems

As we discussed, spaced roof decking was commonly used throughout our area until the mid-20th century because they had limited access to large, full wood sheets. Additionally, the cost prevented widespread use at the time. This traditional method is characterized by deliberate gaps between wooden panels. It was once popular but has been largely replaced by modern installation practices.

Due to high prices and product unavailability, individual boards were typically placed perpendicular to the roof rafters. They were then spaced apart by a few inches. While these gaps were beneficial for ventilation and to prohibit moisture build-up, they have some real disadvantages. Spaced roof decking is not recommended in modern roofing systems for the following reasons:

The Drawbacks Of Spaced Roof Decking

Spaced roof decking, while having its benefits, came with certain limitations. One major concern was the potential for gaps exceeding one inch between panels. This issue could lead to problems with compliance regarding building codes and standards. Excessive gaps could compromise the roof’s structural integrity. It also has an impact on its overall efficiency. Because of this, it can cause leaks, poor insulation, and even rot in some cases.

Modern roofing practices have transitioned to using solid sheeting for roof decking. This involves using large, continuous panels of material without gaps. This shift addresses the concerns of spaced decking. It provides a more robust, secure, and energy-efficient roofing foundation.

The disadvantages of spaced decking

The Advantages Of Solid Sheeting And A Commitment To Modern Roofing

Solid sheeting offers several advantages over spaced decking. Eliminating gaps reduces the risk of code violations and structural weaknesses. It also ensures a more uniform surface for roofing materials. By doing so, it is promoting better insulation and protection against the elements. Additionally, it simplifies the installation process. Lastly, it enhances the overall longevity of the roof.

Your roofing contractors’ commitment to excellence should drive them to adopt modern practices. These practices should enhance your roofing systems’ durability and efficiency. In the end, improving your overall quality. As a homeowner, understanding the shift from spaced roof decking to solid sheeting equips you with valuable insights. These will help you make informed decisions for your roofing needs.

Why Does my Spaced Decking Have to be Replaced?

Spaced roof decking

There are many reasons listed above to replace your homes spaced decking during your roof replacement. More than those, you are likely required to do so. The 2018 IBC (International Building Code) requires that most roof systems be installed on solid decking. Chapter 15 refers to roof assemblies. It can be referenced for your roof systems requirements. 

Additionally, many insurance companies will require an upgrade to solid decking prior to coverage. This is due to the risks associated with spaced decking. So, if your roof replacement is an insurance claim, this may be an issue that arises. 

 Suppose you are considering replacing your roof or have concerns about the condition of your roof decking. In that case, it is always best to consult a licensed roofing professional to advise you on the best course of action. They will also know local codes and the requirements for your specific roofing system. 

Will My Insurance Company Pay To Replace My Spaced Decking?

Spaced roof decking

That’s a tricky question. Many consider spaced roof decking an outdated and subpar installation method. Due to the associated risks, insurance companies can demand its replacement before offering home insurance. Insurance providers also do not cover maintenance and wear and tear. As time passes, spaced decking can weaken, causing the need for a replacement because of normal wear and tear. It’s worth noting that insurance might not cover this replacement.

Moreover, local building codes could require the replacement of decking spaced beyond a certain size. Check your insurance policy to see if it includes a code upgrade provision. If it does and local regulations enforce spaced decking replacement, your insurance company might cover the expenses. Your installer will need to photograph the decking thoroughly, including measurements of the gaps, to ensure insurance approval. Opting for a local, licensed roofing company is wise. Their experience can streamline the process prior to and during a replacement.

Without a code upgrade clause in your policy, you’ll be responsible for the cost if your area requires spaced decking replacement. These requirements mean that the roof can only be reinstalled after changing the decking. Make sure that you do a thorough review of your roof replacement estimate. Make sure any charges associated with code upgrades are being provided to your insurance company for reimbursement. 

Homeowners should carefully review their homeowner policies. In doing so, check if they’re covered for code upgrades. This review also presents an excellent opportunity to make policy adjustments before storms or roof replacements. For assistance with reviewing your roof decking needs, consider reaching out to Custom Exteriors, licensed roofing contractors who are more than willing to help.

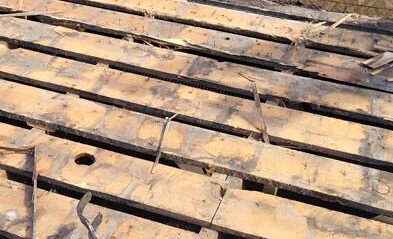
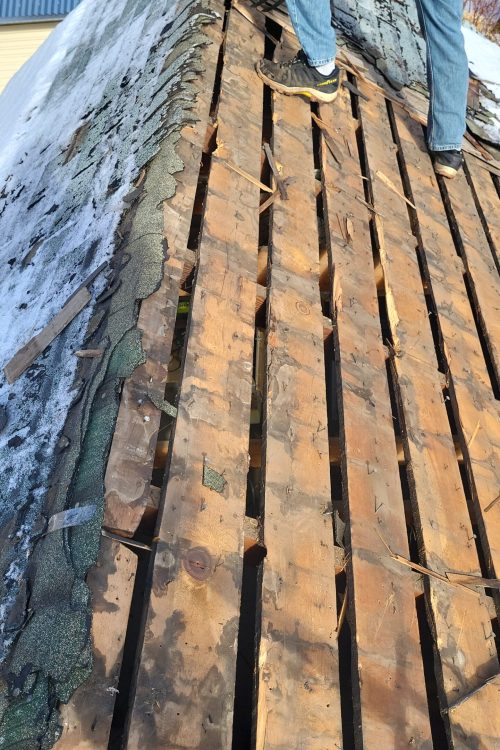
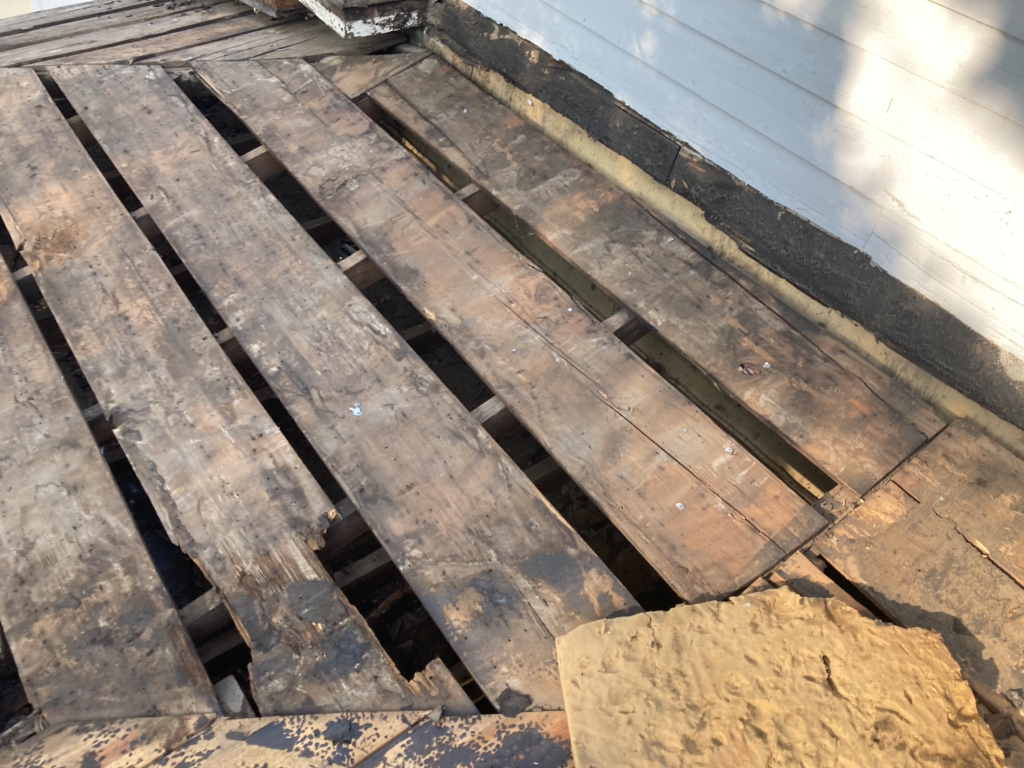
Spaced decking discovered by Custom Exteriors during a roof replacment
Spaced roof decking replacement
Asphalt shingle roof installation by Custom Exteriors

Your Asphalt Shingle Roof

Asphalt shingle roof installation by Custom Exteriors

Table of Contents

Asphalt Shingle Roofing systems: What You Should Know

When was the last time you took a good look at your roof? For most homeowners, the answer is typical: “Not recently.” As a roofing contractor with decades of experience in the industry, we find that roofs don’t get much attention until there is a problem. We typically experience calls when some shingles have been blown off, or they have been impacted by storm damage , or a leak develops due to an ice dam or missing shingles. But what if I told you that you could prevent these issues before they even start? 

Based in Colorado, the majority of residential and multi-family roofs are made up of asphalt shingles. They are also used from time to time in commercial roofing. Because they are affordable and fairly durable, they are a common roof replacement choice. So, learning about your asphalt shingle roof makes sense. Just like any other system in your home, your roof needs routine care, and that involves having a clear understanding of the system and its needs. 

We want to help you understand everything you need to know about this common roof system to show how proactive learning can save you from the headaches and repair bills that an unmaintained roof can cause. By understanding the basics of your asphalt shingle roof, you can be better prepared to maintain this important defense mechanism against Mother Nature’s severe weather! 

What are asphalt shingles made of?

Asphalt shingles are made through a multi-step process and consist of an organic felt or fiberglass base covered with an asphalt coating covered in mineral granules. 

Asphalt shingle roof

The shingle-making process

The shingle manufacturing process starts with the creation of an organic felt or fiberglass mat. This mat then passes through a saturation tank, where it is coated with hot asphalt. This step is crucial as it creates the waterproof barrier of your shingles. 

While the asphalt-coated mat is still hot and tacky, ceramic-coated mineral granules are embedded onto the top surface of the shingles. These granules are what you see when you look at an asphalt shingle roof. In addition to protecting the shingle from UV rays and adding fire resistance, they also allow for color customization, helping blend your roof with your exterior color palette. 

The shingle then goes through a cooling process, where it hardens and the granules set. Once cooled, the large sheet of material is cut into individual shingles in the desired shape and size. 

The back of the shingle is often coated with a fine mineral powder that helps prevent them from sticking together in their packaging and during transport. A strip of thermally activated sealant may be applied to each shingle. This sealant is a major factor in the wind resistance of your asphalt shingle roof, as it helps the shingles bond together once installed on a roof and exposed to the heat of the sun. 

Finally, the finished shingles are bundled and packaged for shipping to distributors for installation across the nation. 

This process combines durability with cost-effectiveness, making asphalt shingles a popular option for residential and commercial roofing applications alike. Asphalt shingles provide a great balance of affordability, longevity, and a fairly straightforward installation process. 

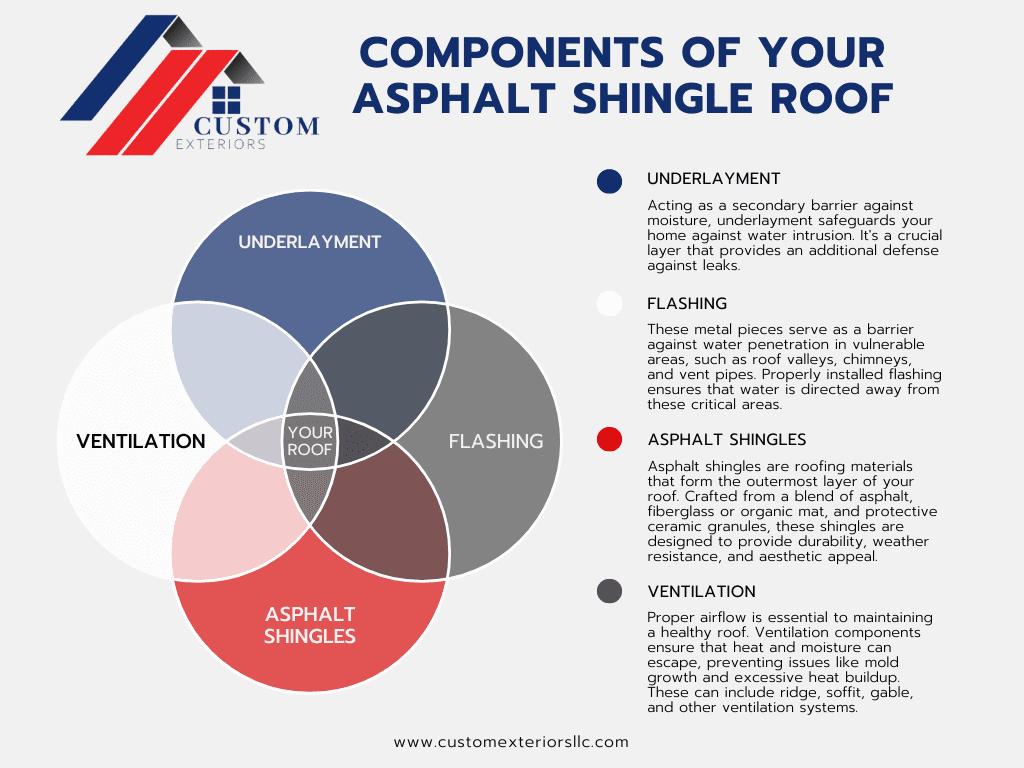
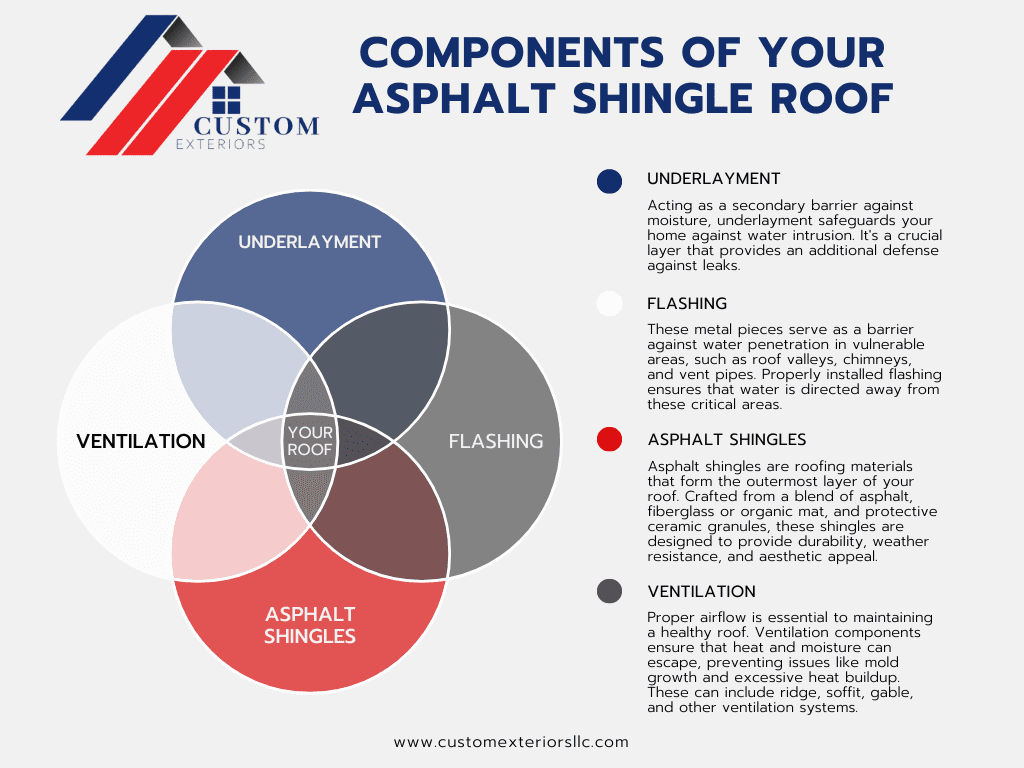
the components that make up an asphalt shingle roof

Components of your asphalt shingle roofing system

Your asphalt shingle roofing system has a lot of different roof components. By understanding how an asphalt shingle roofing system is designed, you can help keep it in good condition and prevent maintenance-related roofing issues. 

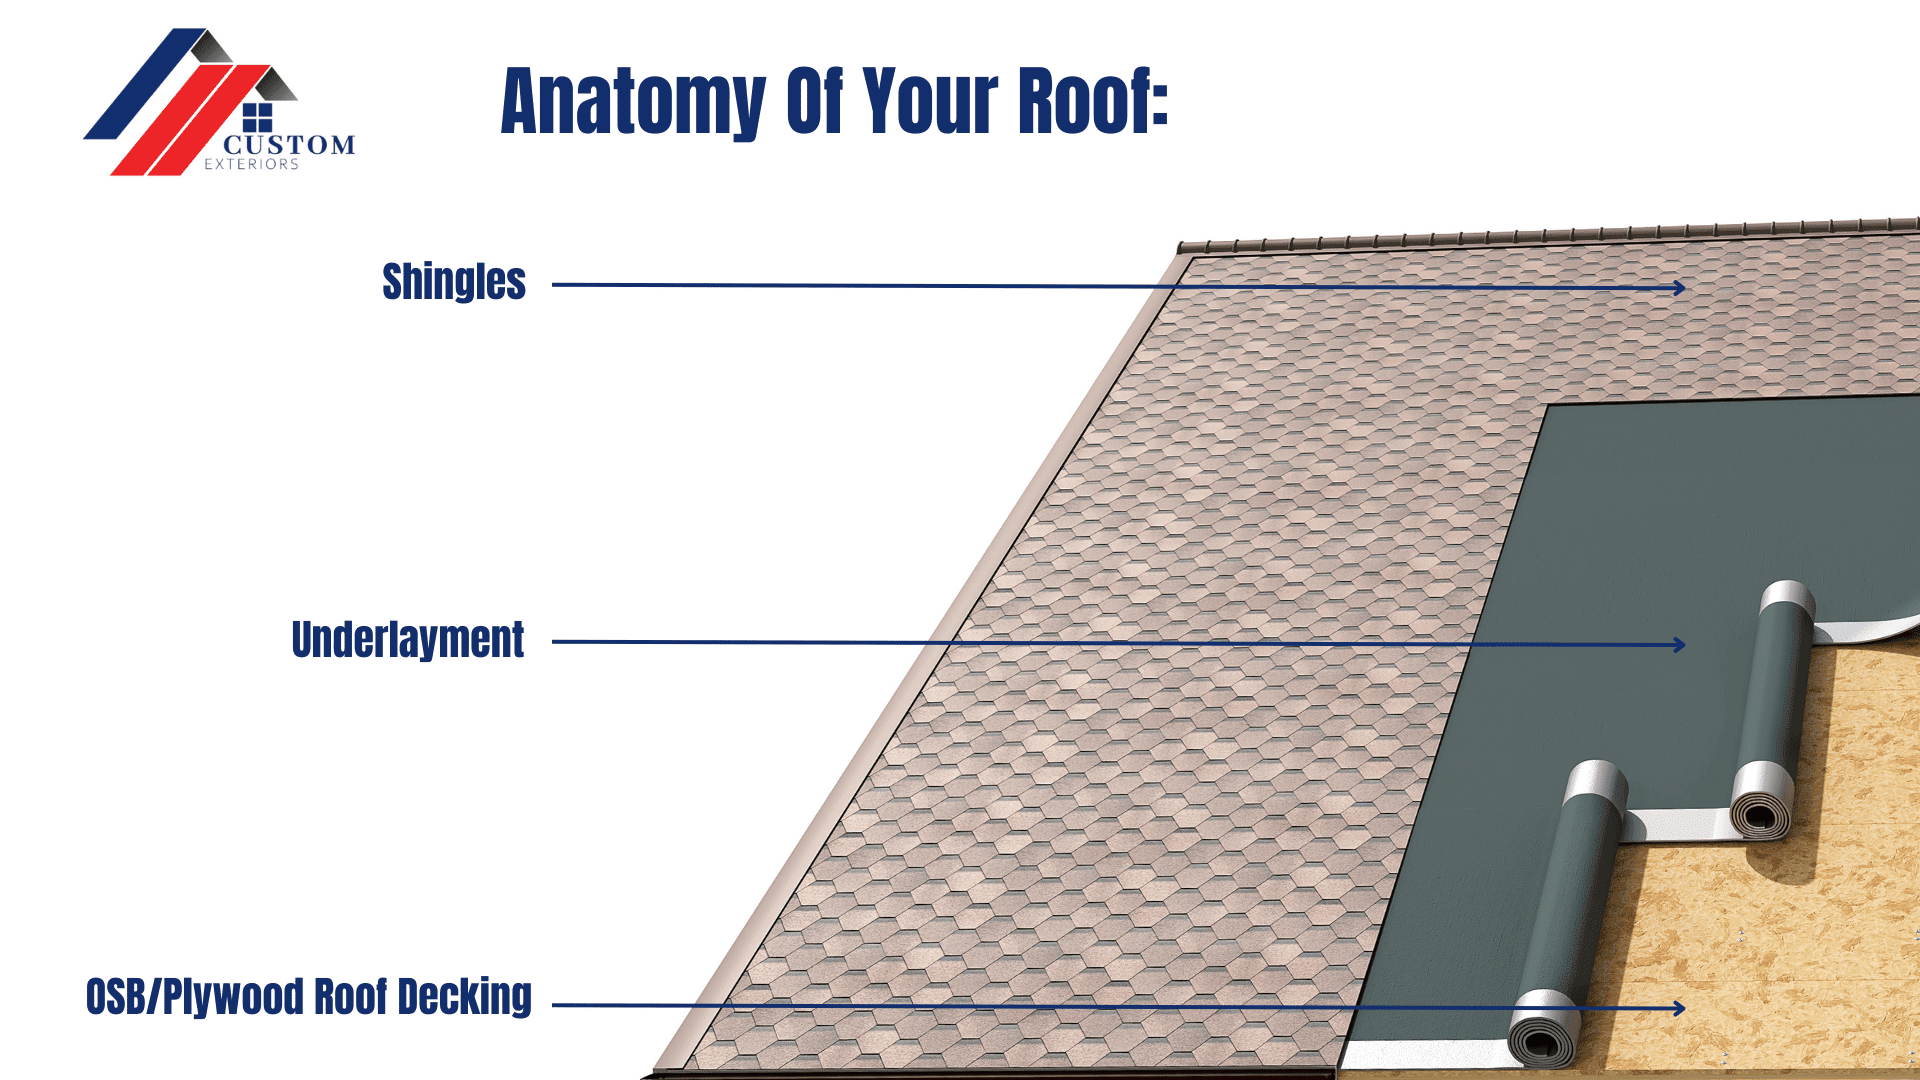
The Foundation your roof: Roof Decking

Every time we replace a roof, the first consideration prior to replacement shingles is the condition of your roof deck. Roof decking is often referred to as sheathing. The roofing decking lays the groundwork for a solid and dependable roof system. The roof deck is the foundation of your system. It must provide structural support and a secure platform for shingles and underlayment.

Modern roof decking is typically made from plywood or oriented strand board (OSB). These materials are chosen for their durability and strength. They have a unique ability to withstand the weight of roofing materials and environmental stressors. Choosing between plywood and OSB may depend on cost, local building codes, and personal preferences. 

In older homes, you may discover you have what is called “spaced decking”. Spaced roof decking is wood planks spaced across the rafters of your home forming areas where shingles can be installed. If the spaces exceed one and a half inches, you will likely have to replace your decking with a solid surface prior to your new roof being installed. 

In addition to offering structural support, roof decking also protects your home from the elements. It acts as a barrier that helps prevent moisture from entering the interior spaces of your house. Paired with underlayment and shingles, roof decking forms a defense against rain, snow, and wind-driven rain.

roofing Underlayment

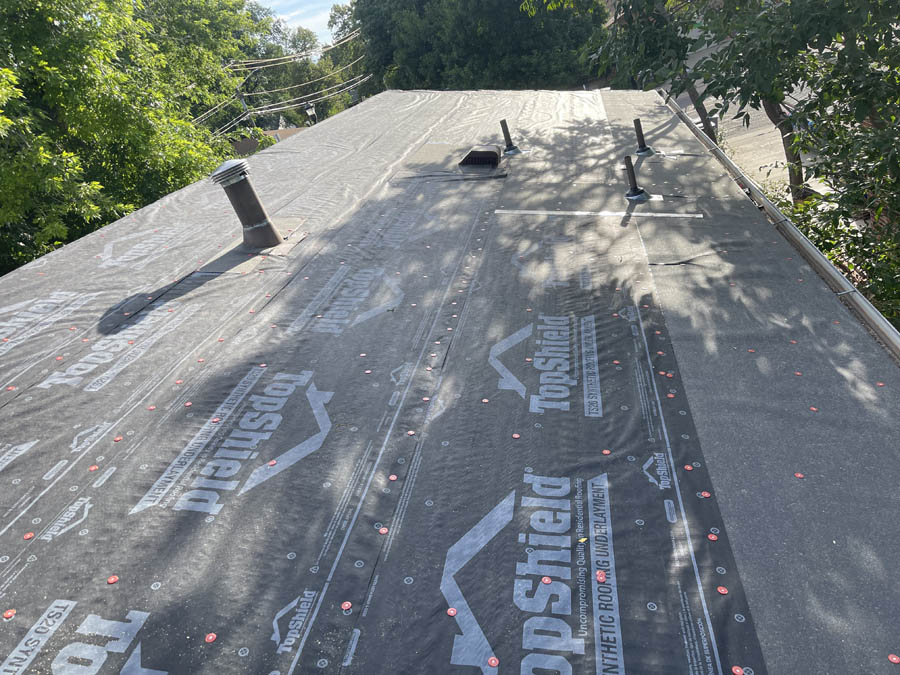
Roofing underlayment protects your home from extreme weather and moisture. It’s consistently working behind the scenes. Once you have removed any previous shingle installations and verified the structure of your decking, underlayment is laid on the roof decking. It is a waterproof barrier that covers the entirety of the roof deck under your shingles. 
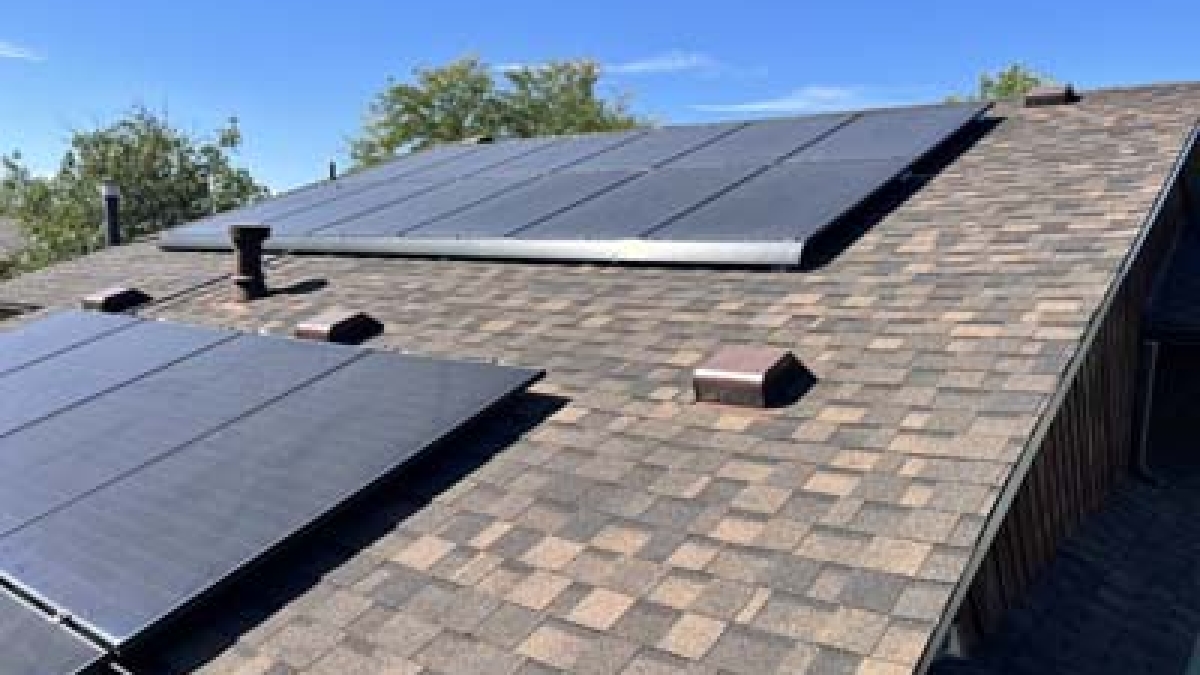
Roofing underlayment is like a safety net. It provides an extra layer of protection beneath your shingles. It’s typically made from asphalt-saturated felt or synthetic materials because those materials guard against moisture. If water gets past your shingles, the underlayment prevents it from seeping into your home.
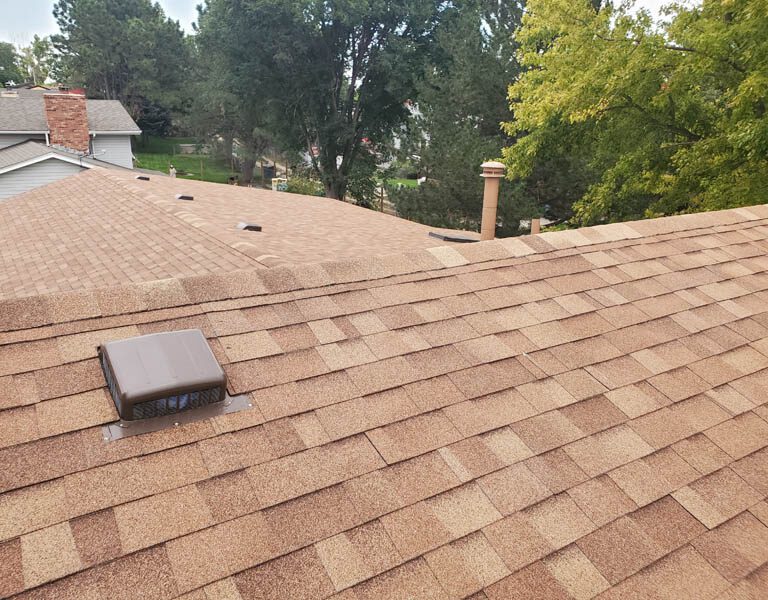
Local roofing codes enforce the need for underlayment, provide appropriate installation techniques, and determine the thickness required. Qualified roofing contractors will be well versed in the requirements for replacing your asphalt shingle roof. 

Asphalt Shingles

Asphalt shingles are a popular choice for roof replacements for many reasons including: 

The top layer of your asphalt shingle roof is the actual shingles. Because of their makeup, asphalt shingles serve as a waterproof barrier for your home. Additionally, they are easy to maintain, can help meet energy-efficiency goals, and provide a beautiful and durable roof on your property. 

The Role of roof flashing

When it comes to keeping your home dry, roof flashing plays a vital role that often goes unnoticed. Think of it as your roof’s guide, directing rainwater away from vulnerable areas. This also ensures that moisture stays outside, which is where it belongs!

Roof flashings are usually made of metal. These include metals such as aluminum, copper, or galvanized steel. It aims to provide a watertight seal at points where your roof intersects with other elements, including areas like chimneys, vents, skylights, and walls. By creating a barrier, roof flashing prevents water from entering your home. Thus safeguarding it from potential leaks and water damage.

When rainwater runs down your roof, your flashings direct that water down valleys, away from walls and chimneys, and into your gutter system for drainage away from your property. Your roof flashings are designed to prevent areas of pooling water on your roof. 

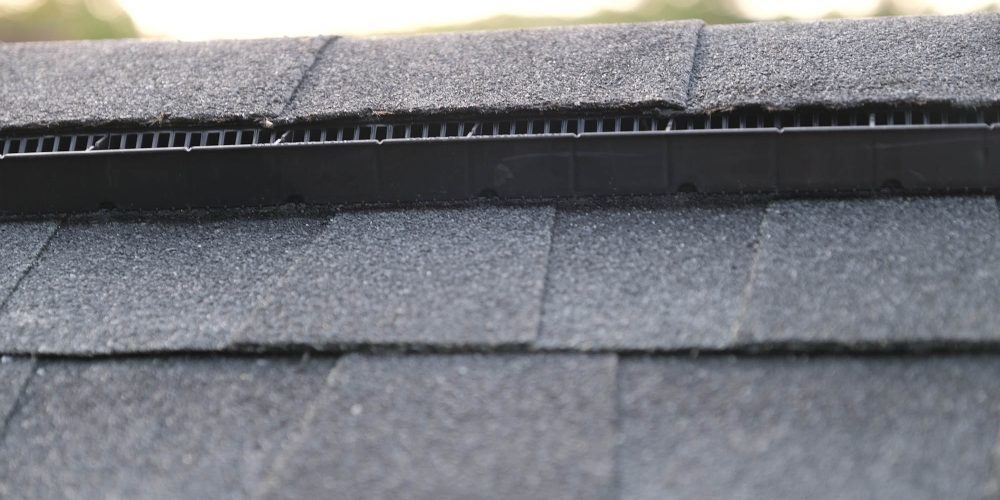
the importance of roof ventilation

#image_title

Your roof needs proper ventilation to stay in functional condition. Roof ventilation allows air to circulate. It can also prevent issues that can arise from trapped moisture.

It’s really all about finding the right balance between intake and exhaust. Intake vents allow cool air to enter. In contrast, exhaust vents expel warm, moist air. This cycle ensures that your attic stays at a consistent temperature and humidity level. Doing so prevents excess moisture buildup that can lead to mold, mildew, and even structural damage. Roof ventilation can take various forms, including ridge vents, soffit vents, gable vents, and turbine vents. Each maintains a balanced and healthy attic environment.

Imagine the scorching summer sun beating down on your roof. Without proper ventilation, your attic can become a sweltering furnace. This can potentially damage your roofing materials. It can also increase energy costs. In winter, trapped moisture can freeze. This then leads to ice dams that compromise your roof’s integrity. However, adequate ventilation creates a controlled environment that wards off these potential issues.

The basics of asphalt shingle roof replacement

Over time, your roof will need to be replaced. In some areas, like Colorado, this may be needed more often due to the severe weather we experience. The roof replacement process should be fairly straightforward. 

Before the replacement begins, a thorough inspection is conducted to determine the current state of your roof. This step helps identify any underlying issues that need attention, ensuring a smooth transition to your new roof. An inspection by a professional roofer can also verify that you need a roof replacement rather than just a repair. Once that is established, the roof will be measured to determine the amount of shingles, underlayment, and other materials needed for the project. At this time, we also note any areas of concern discovered during the inspection and start preparing for shingle delivery and installation day

Once the roof has been inspected, estimated, and delivered, the removal of old shingles and damaged components prepares the roof for replacement. The installation process follows a systematic approach. First, a sturdy underlayment is placed, acting as a moisture barrier beneath the shingles.

The drip edge is then installed on the eaves of the roof. This is an essential step as this metal edging is a preventative measure against water seeping up under the shingles at the base of the roof. 

.

Layer by Layer

First, your underlayment is placed, covering the roof deck and serving as an additional moisture barrier. If applicable, drip edge is then installed on the eaves of the roof, helping prevent water from seeping under the edge of the underlayment at the base of the roof. Then, the asphalt shingles are installed to form a protective layer against the elements. 

Look for a roofing contractor who is skilled and knowledgeable in appropriate placement and nail patterns. The installation will begin with a starter row of shingles. These are installed along the roof’s eaves. These shingles are specially designed to provide a secure base for the rest of the shingles. 

The standard shingles are then installed at the roof’s bottom edge. From there, they work their way up to the ridge. Roofing nails are used to secure each shingle in place. The shingles must be cut around roof vents, chimneys, and other obstacles as required. 

Once the shingles are installed up to the ridge of the roof, ridge shingles are installed along the roof’s peak. These provide a finished look and also protect against wind damage. 

Areas of penetration are then sealed and caulked. This is to help prevent any water intrusion.  Upon completing these steps and many more, all debris is cleaned. A reputable roofing company should run magnets to remove any nails or metal in the landscaping. Additionally, they should complete a final roof inspection to ensure it meets local codes. 

professional roofing company can assist with each step, from design to installation!

Safeguarding your investment: roof maintenance essentials

Roof maintenance is an important part of making sure your roof is in working condition and continues to keep your roof safe and dry. The key components of roof maintenance include: 

Regular inspections of your roof can find damage and save money in the long run

Occasionally, it’s a good idea to have a professional roofing contractor inspect your roof. They can identify potential issues that you might miss and provide expert maintenance or repair advice. Regular and thorough maintenance can extend the life of your roof, improve your home’s energy efficiency, and prevent costly repairs in the future. 

The financial wisdom of roof maintenance

While it’s easy to overlook, regular roof maintenance isn’t just about preventing leaks. It’s also a smart financial move. Investing in routine maintenance can save significant amounts in the long run. Minor maintenance issues can quickly become costly repairs, and by maintaining your roof, you can often save on more major repair projects down the line.

"Depending on the type of repair, roof repair costs can run anywhere from $150 to $400 for minor repairs and up to $8,000 for major repairs."  ~Forbes

Your roof’s lifespan can be extended through proper care. A well-maintained roof is less likely to suffer from premature deterioration, ensuring that you get the most out of your investment. With regular inspections, cleaning, and minor repairs, you can enjoy a roof that stands strong for years to come.

Maintaining your roof long term

Your roof is an important part of your exterior. Not only is it a huge part of your home’s exterior curb appeal, but it also provides protection from the harsh elements your home faces. From asphalt shingles to underlayment, from flashing to ventilation. Each component ensures your home’s protection, comfort, and style. As seasons change and time passes, your roof protects against the elements.

At Custom Exteriors, we’re more than a roofing company – we’re also your partner in maintaining the integrity and beauty of your home. From installation to maintenance, we bring expertise and dedication to every step of the process. So, whether you’re considering a roof replacement, exploring ventilation options, or seeking a trusted partner for routine maintenance, we’re here to ensure your roof remains a source of pride for years.

modified bitumen roofing

Modified Bitumen Roofing Systems

The Complete Guide to Modified Bitumen Roofs: Maintenance, Cleaning, and Repairs

When it comes to protecting your home from the elements, your roof plays an important role. One roofing option that has gained popularity is modified bitumen or mod-bit roofing. Its durability and performance are, without a doubt, the reason the modified bitumen roof has become so popular. Whether you’re a homeowner considering this type of roofing or simply curious about it, we are here to help! This article will discuss the details of a modified bitumen roof. This will include how to maintain it, clean it, and handle basic repairs.

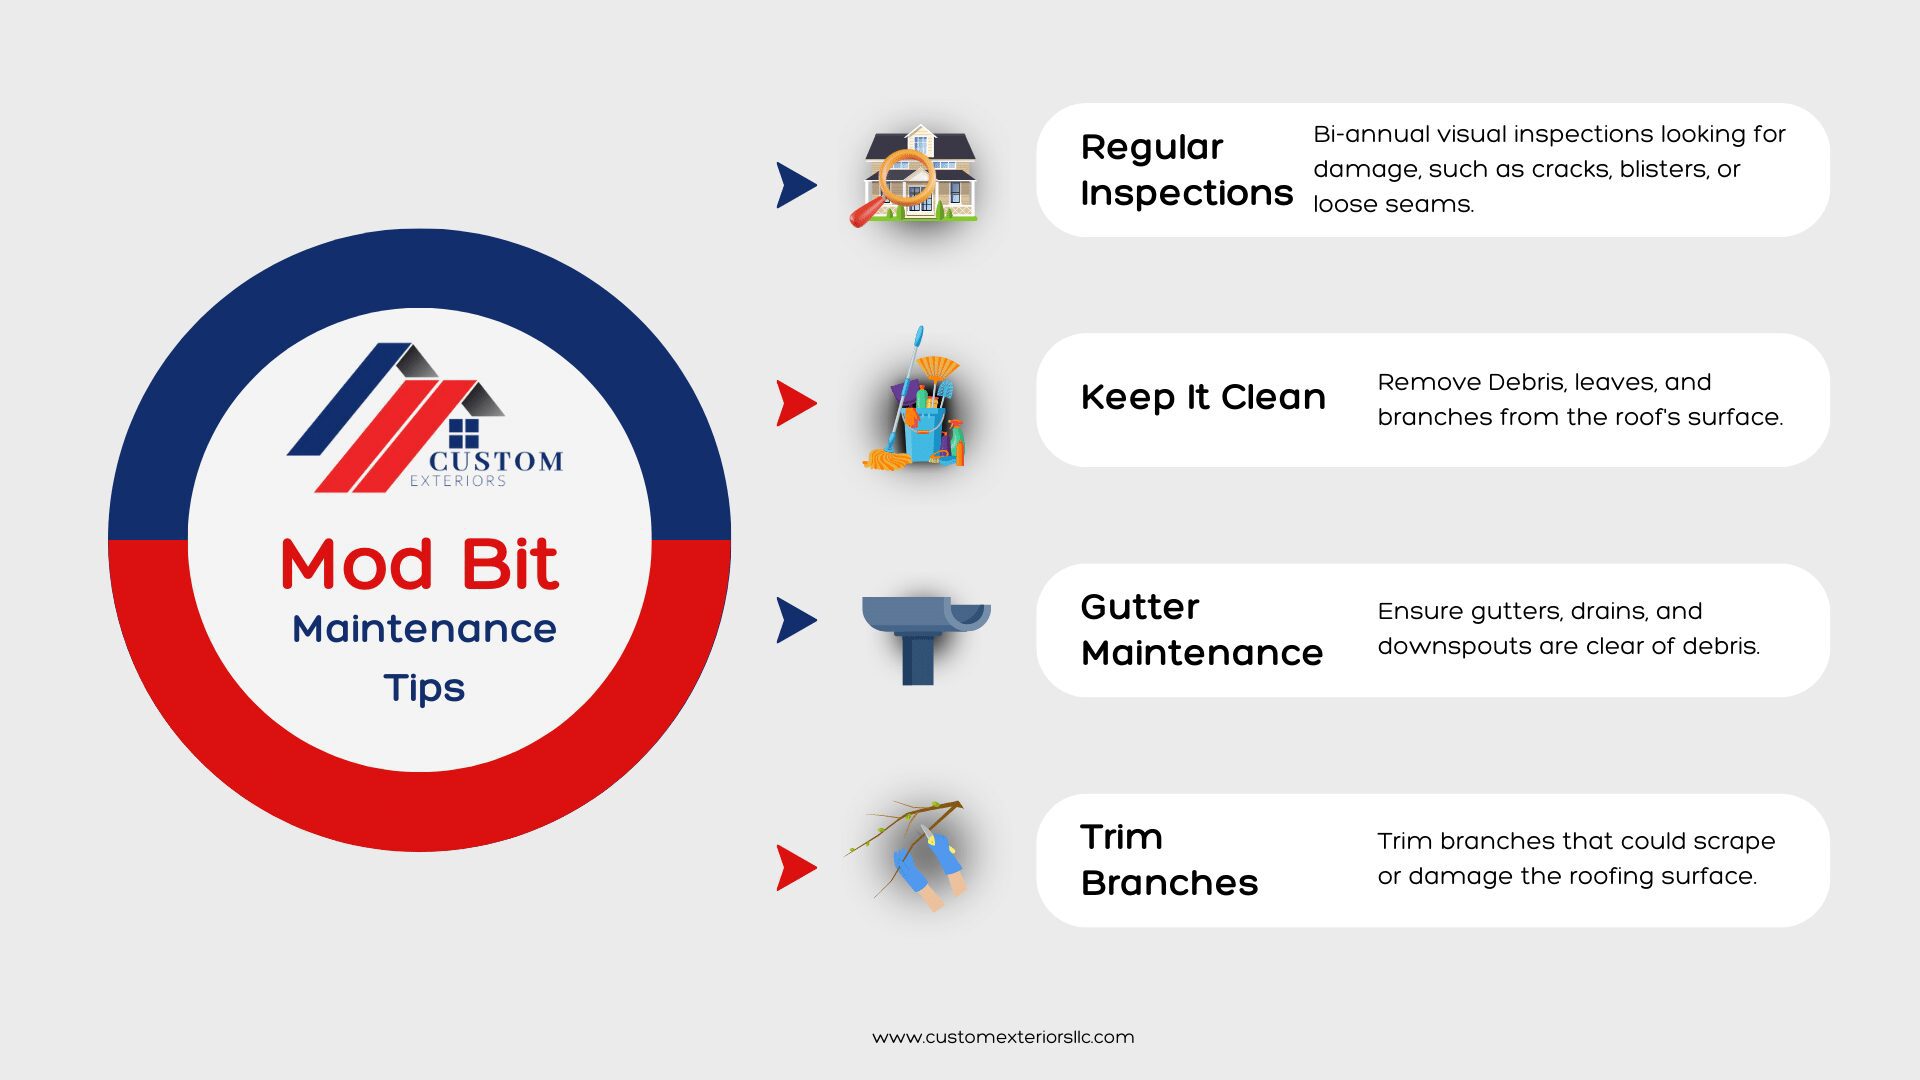
We will review how regular inspections act as the first line of defense for your modified bitumen roof. Doing this allows you to catch and address issues early. Visual checks bi-annually spot wear and tear. They also identify more serious problems like cracks, blisters, or loose seams. This approach ensures you prevent minor concerns from becoming costly repairs. Or, worse than that, an early roof replacement.

Understanding Modified Bitumen Roofs:
Your Property's Defender

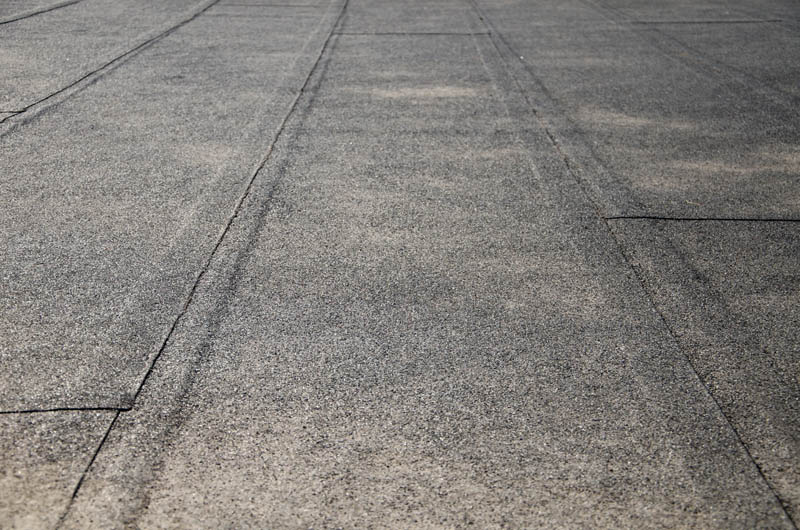
Modified bitumen roofing is often referred to as a mod bit roof. It is a roofing material that combines asphalt with other materials to create a durable, weather-resistant roofing system. Because of this, it’s commonly used on flat or low-slope roofs.  It’s a great choice for both residential and commercial buildings. The term “modified” indicates that the asphalt has been improved or modified. That is done to improve its performance.

The roofing material is created by layering asphalt with additives like polyester or fiberglass to increase its strength and flexibility. This layered approach gives the roof durability, allowing it to withstand many weather conditions. These include heavy rain, extreme temperatures, and UV radiation.

Modified bitumen roofing is valued for its long lifespan. In addition, it’s known for weather resistance and ease of repair. Regular maintenance, prompt repairs, and proper drainage are vital. This will ensure your roof’s continued performance and durability.

Maintenance Tips For A Long Roof Lifespan

Maintenance tips for a mod bit roof

Regular inspections are necessary because they identify and address potential issues early on. This approach saves you time and money. For example, this form of maintenance prevents minor problems from turning into major repairs. Things such as removing ponding water and ensuring proper drainage are vital in avoiding water or roof damage. In addition, it is important to inspect flashing and seams.  

Keeping the roof surface clean prevents debris buildup. Debris buildup leads to moisture and even structural damage over time. So, regularly inspecting gutters and downspouts ensures that rainwater is effectively channeled away from the roof. Doing so reduces the risk of leaks and water damage.

Caring for your modified bitumen roof:
A Guide by Custom Exteriors

Maintenance on your modified bitumen roof is easier than it sounds. In fact, it’s a smart way to ensure your roof stays strong. By doing basic maintenance, you protect your home for years to come.

Just like you go for a check-up at the doctor’s, your roof needs regular check-ups too. Think of it as a way to catch any problems before they become big issues. To keep things simple, check your roof at least twice a year. The best times are once in the spring and once in the fall. This timing is great because it’s right after the rougher weather has passed. Hail and snow storms sometimes cause trouble for your roof. So, these check-ups help you catch any issues early.

What to look for when inspecting your mod bit roof

During your regular roof inspections, you should keep an eye out for a few important things:

Maintaining a modified bitumen roof involves regular inspections and cleaning. In addition to this, you should address any repairs as soon as possible. Hail and snow storms can wreak havoc on your roofing system. The first step in maintaining your mod-bit roofing system is these regular inspections. These regularly scheduled inspections should include the following:

  1. Surface Damage: Check for any cracks, blisters, punctures, or tears on the surface of the roof
  2. Flashing: Inspect the flashing around the roof’s edges and penetrations.
  3.  Drainage: Ensure the roof drainage system functions correctly and no pools are forming on the roof’s surface. 
  4.  Roofing Seams: Inspect the seams of the system for any signs of separation. 
  5.  Granule Loss: Loss of granules is a sign of damage and wear. 
Mod bit roof maintenance contractor

Cleaning Your Modified Bitumen Roof

Regular cleaning is the second important step in maintaining your modified bitumen roof. Remove debris, such as leaves or branches, from the roof’s surface. Use a broom or brush to sweep the roof’s surface to remove any loose dirt, dust, or debris. At this point, your roof should be clear of all large and small debris. Once the roof is clear, apply a cleaning solution for mod bit roofing systems. You can purchase this solution from your local home improvement store or roofing supplier. Follow the manufacturer’s instructions for application. 

When cleaning the surface of your roof, use a soft-bristled brush or sponge to scrub the surface gently. Never use a pressure washer, as it can damage the roofing material. Once you have cleaned the surface, rinse the roof’s surface with a hose. Make sure to remove all of the cleaning solution from the roof. 

Lastly, inspect the surface for any damage or signs of wear and tear once the roof is clean and dry. Any issues should be addressed immediately to prevent further damage. It is important to note that mod bit roofing systems need regular maintenance to keep them in good condition. Even if you are doing regularly scheduled maintenance, you should have your roof inspected by a professional every few years. This helps to ensure it is in good shape and any issues are being addressed. 

Repairing Your Modified Bitumen Roofing System

Commercial roofing contractor completing flat roof replacement in Greeley

Repairs should be made after your mod-bit roof has been cleaned and inspected. Completing these as soon as possible to prevent further damage. If you are uncomfortable inspecting or repairing your roof, consider hiring a professional roofing contractor to do the work for you. A professional can help ensure that your roof is properly maintained. They also ensure issues are addressed promptly. Following these steps can help your mod-bit roof stay in good condition. And, in turn, lasts for many years. 

A professional roofing contractor will assist in inspecting the condition of roofing seams, granule loss, and state of roof flashings. Additionally, they should ensure your roof has proper drainage. They will also be able to address any issues promptly with roofing expertise, thus providing a proper repair. 

Consider the Age of Your Modified Bitumen Roof

With proper installation and maintenance, your modified bitumen roofing system should last 10 to 20 years. This obviously depends on your unique conditions. It’s essential to keep in mind the age of your roof. Even with proper installation and maintenance, your modified bitumen roof will likely be at the end of its life as you get closer to that 20-year mark. A professional roofing contractor like Custom Exteriors can assist in determining if you are a candidate for mod-bit roof repairs or if it is time to replace your roofing system. 

PVC roof system contractor

Everything You Need to Know About a PVC Roofing System

What is a PVC Roofing System?

What is PVC Roofing?

PVC roofing is a type of roofing material made from Polyvinyl Chloride (PVC). It is a thermoplastic material that is durable, lightweight, and resistant to weathering, fire, and chemicals. While it is most often used for commercial and industrial buildings, it can also be found in residential applications. 

PVC roofing comes in many forms, including sheets, membranes, and panels, and is available in various colors and textures. It is typically installed using hot air welding, which fuses the seams and creates a weather-tight seal. It is easy to maintain and can last for many years with proper roof maintenance

One of the main advantages of PVC roofing is its energy efficiency. PVC roof systems reflect a significant amount of heat and light, thus reducing cooling costs and making the building more comfortable in hot weather. Additionally, PVC roofing systems are often made from recycled materials and can be recycled at the end of their useful life, making them an environmentally friendly option. 

How is PVC Roofing Made?

PVC roofing systems are manufactured using a process called extrusion. Here are the basic steps involved:

  1. Mixing: First, raw materials are mixed together in a large mixer. The materials include PVC resin, plasticizers, stabilizers, and other additives. 
  2. Extrusion: the mixed materials are then fed into an extruder, which heats and melts them into a uniform liquid. The liquid is then forced through a die that shapes it into a continuous sheet of PVC roofing material. 
  3. Cooling: As the PVC sheet emerges from the die, it passes through a series of cooling rollers that gradually bring it down to room temperature. This helps ensure it maintains its desired shape and properties. 
  4. Cutting and finishing: Once the PVC sheet has been cooled, it is cut into the desired length and shape. 

Overall, the process of manufacturing PVC roofing systems is automated and can be done on a large scale. Because of this, it is a cost-effective and efficient choice for many roofing applications. 

Types of PVC Roofing

There are multiple types of PVC roofing systems available. Some of the most common types of PVC roofing systems include single-py PVC roofing, mechanically attached PVC roofing, fully adhered PVC roofing, and ballasted PVC roofing. 

The single-ply PVC roofing is the most common type. It involves installing a single layer of PVC roofing membrane over the roof deck. The membrane is typically reinforced with polyester or fiberglass to improve its strength and durability. Mechanically attached PVC roofing systems attached the PVC to the roof deck using fasteners. It is faster and easier than hot air welding but can be less watertight and may require more maintenance over time. Fully adhered PVC roofing bonds the PVC membrane to the roof deck. It provides the most robust and watertight seal but is more expensive and time-consuming to install. Lastly, ballasted PVC uses gravel or pavers to hold the membrane. It is less costly and provides excellent insulation, but it can be more challenging to repair if damage occurs. 

The best type of PVC roofing for your property will depend on factors such as the size and slope of the roof, the weather conditions in your area, and the desired level of insulation and energy efficiency. Your local roofing expert can help discuss these options to ensure the proper fit for your property. 

Benefits of PVC Roofing Systems

PVC roofing system

PVC roofing systems offer several benefits over other roofing systems. Some of the main advantages include the following: 

  1. Durability: PVC roofing systems are highly durable. They can withstand harsh weather conditions, including wind, rain, snow, and hail. This can benefit areas prone to severe weather, such as Colorado and Wyoming. It is also resistant to fire and chemicals, making it a good choice for industrial and commercial applications. 
  2. Energy Efficiency: PVC roofing systems are highly reflective. This can provide good insulation and help reduce both heating and cooling costs. 
  3.  Easy Maintenance: PVC roofing systems are easy to maintain and require minimal upkeep. It is resistant to mold, mildew, and algae growth, thus keeping the roof clean and debris-free. 
  4.  Long Lifespan: PVC roofing systems can last up to 30 years or more with proper installation and maintenance. 
  5.  Environmentally Friendly: PVC roofing systems are often made from recycled material and can be recycled at the end of their useful life. Because of this, it helps lower the building’s carbon footprint. 

PVC Roofing Systems for Your Flat Roof

PVC roofing systems can be a good choice for many applications, but whether or not it is the best choice will depend on various factors, such as the climate and weather conditions, the size and slope of the roof, and the building’s intended use. A qualified flat roofing contractor will be able to walk you through the options best suited for your facility. 

While PVC roofing provides many benefits, such as energy efficiency, durability, low maintenance, and a long lifespan, some factors must be considered to determine if a PVC roofing system is right for you. For example, PVC roofing systems can be more expensive than other roofing materials and may not be suitable for roofs with steep slopes or complex shapes. Choosing a reputable manufacturer and installer is also essential to ensure the PVC roofing system is installed correctly and will perform as expected over its lifespan. 

If your roof has a pitch of lower than 2:12, it is considered a low slope. Because of this downward slope, water does not drain off the roof’s surface as it would in a high-pitch design. Asphalt shingles are not designed to handle standing water, so that a PVC roofing system may be a good fit for your low-slope roof design. 

With decades of experience, Custom Exteriors has provided Colorado property owners with high-quality flat roof solutions. You can count on us to help you design a functional flat roofing system that will protect your building for years to come!

EPDM Roof inspection by Custom Exteriors in Northern Colorado

Everything You Need to Know About an EPDM Roofing System

EPDM Roof inspection by Custom Exteriors in Northern Colorado

Everything you need to know about your EPDM Roof

If you have an EPDM (Ethylene Propylene Diene Monomer) roof, you know what a dependable choice it is for a commercial roof replacement. As a commercial roofing contractor, we have seen firsthand how the right (or wrong) roofing can significantly impact a building’s integrity, energy efficiency, and overall maintenance costs.  

EPDM roofing is known for its remarkable ability to withstand extreme weather conditions, making it a great choice in Colorado, which is prone to severe weather. Its long lifespan and minimal maintenance requirements make it attractive to building owners and property managers looking to maximize their investment.

In the following sections, we’ll explore everything from the basics of EPDM roofing and its advantages to installation processes, maintenance tips, and cost considerations. So, whether you are looking to replace an old roof or are constructing a new building, our goal is to equip you with the knowledge to choose a roofing system that meets your needs and your budget. With EPDM roofing, many have found a reliable solution that stands the test of time while also being gentle on the budget.

What is EPDM roofing?

A diagram made by Custom Exteriors to explain an EPDM roofing system visually

EPDM roofing is made from a synthetic rubber called Ethylene Propylene Diene Monomer. These roofing systems are a popular choice for low-slope/flat roofs. EPDM roofing systems are highly durable and can last up to 50 years or more with proper maintenance. Because of their makeup, they are very resistant to UV radiation, weathering, ozone, and other environmental factors that can cause damage to other roofing materials, such as asphalt shingles

EPDM roofing systems are relatively easy to install and require minimal maintenance, making them an extremely cost-practical choice for flat roof systems. They can be used on various roofs, including flat and low slopes, and are available in multiple thicknesses and colors to suit different design requirements. 

Because EPDM roofing systems are highly reflective, they can help keep buildings cooler in hot weather and reduce energy costs. This type of roofing system is also a recyclable material and does not release harmful chemicals into the environment during installation or use. Your local roofing contractor can tell you if an EPDM roof is a good fit for your property. 

The Pros and Cons of EPDM roofing

EPDM roofing is a standout option for commercial buildings. Its benefits make it a common choice for commercial roof replacements in our area. However, like any roofing system, it has its own set of limitations that might impact its performance on your property. 

Advantages of EPDM roofing

  1. Durability: EPDM roofs are built to last, often serving well for over 20 years with proper care. This durability stems from the material’s resistance to weather, including harsh sunlight, heavy rain, and even snow, ensuring your building stays protected year-round. 
  2. Cost Effectiveness: EPDM is more affordable than other roofing materials in terms of initial costs and long-term maintenance. Its ease of installation further reduces labor costs, making it an economically wise choice for large commercial roofs.
  3. Flexibility: EPDM is known to be flexible in cold weather, which makes it appealing to Colorado property owners. Unlike some materials that can become brittle and crack in low temperatures, EPDM remains flexible, reducing the risk of damage during colder months. 
  4. Energy Efficiency: EPDM has high heat-reflective properties, especially with lighter-colored membranes. This can lead to lower cooling costs in the warmer months, contributing to a more energy-efficient building overall. 

disadvantages and considerations

  1. Sensitivity to Punctures: Though durable to weather, EPDM can be punctured by sharp objects. Regular inspections and immediate repair of any damage are crucial to prevent leaks.  
  2. Potential for Shrinkage: While not common in properly installed EPDM roofs, shrinkage can occur, potentially affecting the roof’s integrity. Choosing a reputable contractor for installation and performing regular maintenance can mitigate this risk. 
  3. Aesthetic Limitations: EPDM typically comes in black or white, which may not suit all architectural styles. Because its appearance is simple and functional, those looking for more color or texture options might find EPDM’s choices limiting.  
  4. Comparative Analysis with Other Materials: While EPDM excels in many areas, there are scenarios where other materials may offer benefits that better align with your property’s needs. For example, TPO and PVC roofing, other types of single-ply membranes, offer different advantages in terms of reflectivity and chemical resistance.  

It’s important to consider your property’s specific needs and the climate and environmental factors it faces. EPDM roofing is a durable, cost-effective option for commercial properties looking for a long lifespan with low maintenance needs. However, as with any significant decision, weighing these factors carefully will help you choose the best system for your commercial roof replacement. 

Types of EPDM Roofs

EPDM installation type comparison infographic created by Custom Exteriors

Fully Adhered EPDM Roofs

In this EPDM roof system, the EPDM membrane is adhered to the roof substrate using a specially formulated adhesive. It provides a strong bond between the EPDM and the substrate, making it ideal for roofs with complex shapes or curved surfaces. Fully adhered EPDM roofs can be more expensive to install than Mechanically Fastened or Ballasted EPDM roofs.

Again the roof deck must be cleaned and have existing roofing material removed. After this, a specially formulated adhesive is applied to the roof substrate using a trowel or sprayer. The EPDM membrane is then rolled out onto the roof deck and carefully positioned to overlap the adhesive layer. The membrane is then smoothed out to ensure good contact with the adhesive. 

Once the EPDM membrane is attached to the deck, the seams are sealed using adhesive or specialized tape, preventing water intrusion. Lastly, flashing around all roof penetrations prevents water from entering the building. 

Ballasted EPDM Roofs

Ballasted EPDM roofs use a ballast layer to hold the EPDM membrane in place. This is the most economical and straightforward method of installation. It is ideal for roofs with low slopes or no slope conditions. 

Unfortunately, if damage occurs, ballasted EPDM roofs can be more challenging to repair. The ballast layer must be removed prior to repair, which can be time-consuming and labor-intensive. 

Once the roof deck is thoroughly cleaned, a layer of insulation is installed on top of the roof deck. The EPDM membrane is rolled onto the deck and cut to size. After it has been positioned, a ballast layer is applied on top of the EPDM membrane to hold it in place. This ballast can be gravel or pavers and typically ranges from 1.5 to 3 inches thick. Like the other systems, seams must be sealed, and penetrations flashed to prevent water intrusion. The ballast can also protect against hail damage and other effects of extreme weather. 

Mechanically Fastened EPDM Roofs

This type of EPDM roof system is installed by mechanically fastening the EPDM membrane to the roof deck using special fasteners and plates. This application is handy in high-wind or uplift locations, providing a secure attachment. 

First, the roof deck must be cleaned and any existing roofing materials removed. Then, a layer of insulation is installed on top of the roof deck. This provides thermal resistance and improves energy efficiency. The EPDM membrane is then rolled onto the roof deck and cut to size. Mechanical fasteners are placed along the edges of the membrane and in the field at specific intervals to ensure the membrane is securely attached. 

Once the EPDM membrane is attached, your commercial roofer will seal the seams with adhesive or specialized tape to prevent water from penetrating the roof system. Lastly, flashing is installed around roof penetrations, including vents, pipes, and skylights.  

EPDM Roofing maintenance 101: Protecting your investment

If our experience has taught us one thing in commercial roofing, it is the fact that maintaining and repairing your EPDM roof is directly related to its lifespan and the protection it provides for your property. Regular upkeep not only extends the life of your roof but also helps prevent minor issues from becoming major, costly problems. 

Owners and property managers who take a reactive approach to roof maintenance spend an average of .25¢ per square foot per year on maintenance-related issues. On the other hand, those who take a proactive approach spend an average of only .14¢. ~Buildings.com

Regular maintenance

The average replacement cost of an EPDM roof ranges between $4.00 and $15.00 per square foot, so a commercial roof replacement can be expensive. However, there are some important reminders about exterior maintenance that you may not be aware of. 

Whether you choose a structured maintenance plan or do your own commercial roof maintenance, in order to keep your EPDM roof in top condition, the following maintenance tasks should be conducted bi-annually. 

EPDM maintenance tasks

  1. Inspections: Conduct thorough inspections of your EPDM roof at least twice a year and after major weather events such as hail or high winds. Look for signs of wear, such as cracks, punctures, or areas where the membrane might have pulled away from the edges of the roof. While we recommend bi-annual inspections, additional inspections completed after severe weather will help to catch any possible damage caused by the storm quickly. By addressing minor issues immediately, you prevent some major issues that can be caused by roof leaks, such as mold and interior damage. 
  2. Cleaning: Keep the roof surface clean from debris, dirt, and leaves. A clean roof allows for proper drainage and prevents water from pooling (a common cause of roof damage over time.) Use a soft-bristles brush and a gentle cleaning solution if needed to avoid damaging the membrane. Remember, an EPDM roof is less resistant to some chemicals than other roofing systems. Avoid using harsh cleaning agents or damaging tools when cleaning. 
  3. Drainage: Ensure that your roof’s drainage system is working correctly. Whether your building utilizes roof drains or a traditional gutter system, regularly clean out gutters, downspouts, and drains to prevent blockages. Proper drainage reduces the risk of water accumulation that can lead to leaks and other water-related damage. 
  4. Immediate Repairs: During your inspections, address small issues, such as minor punctures or seams starting to come apart, immediately. Small, proactive repairs can prevent larger issues and help maintain the roof’s integrity. 

By quickly addressing any issues found during inspections, you can significantly extend the life of your EPDM roofing system. In doing so, you ensure it continues to provide reliable protection for your commercial property. Regular, attentive care allows you to maximize the investment you made in your roof and avoid unexpected issues that could disrupt your business. The most common signs you need to call in a commercial roof are: 

Damage to an EPDM roof membrane discovered during a roof inspection by Custom Exteriors that resulted in the an EPDM roof repair

Choose an EPDM Roofing Systems For Your Flat Roof

If you are replacing the roof on your commercial building and considering EPDM, choosing the right system is crucial. This choice will impact not just the roof’s performance but also the overall maintenance needs of your building. Your choice can also significantly impact the building’s energy efficiency and costs over time. 

Understanding your buildings requirements

Just as important as the roofing system, it is important to choose a commercial roofing contractor with experience in installing the specific system you are considering. They will be able to provide you with the pros and cons of the system you are considering, making your decision easier. Check their references and reviews. 

Choosing the right EPDM roofing system involves carefully considering your building’s needs, the specific advantages and drawbacks of each system, and selecting a qualified contractor. By taking these steps, you ensure that your building is equipped with a roofing system that not only meets your immediate needs but also serves as a long-term asset. 

In summary, EPDM roofing system offers a range of benefits. They are highly durable and can last up to 50 years with proper installation and maintenance. EPDM roofs are highly flexible and can adapt to changes in temperature and weather conditions without cracking or deteriorating. Because of this, they are not prone to water leakage. 

EPDM roofing systems are highly reflective, making them exceptionally energy efficient. They are made from a recyclable synthetic rubber material, so they are also an environmentally friendly choice. 

The installation process for mechanically fastened, fully adhered, and ballasted roofing systems are relatively straightforward. Because of this, property owners can save both time and money! Additionally, once installed, they require minimal long-term maintenance. Occasional inspections and repairs are required to keep them in good condition. 

To learn more about EPDM roofing systems, the ERA provides more detailed information. To discuss roof replacement using an EPDM roofing system, contact us today!